Jira is one of the most popular project management tools that has helped millions of teams across the world to work together seamlessly. One of the most powerful features of Jira is its workflows. Jira workflows help teams to define, organize and manage their work in a structured and efficient manner. In this blog, Jira Guru will demystify Jira workflows and discuss everything you need to know to make the most out of them.
What are Jira workflows?
Jira workflows are a set of rules and processes that define the life cycle of a task or issue. Workflows are designed to help teams to manage their work and collaborate effectively. They provide a structured way to move work through different stages, from creation to completion.
While statuses and transitions are two of the most essential components of a Jira workflow, there are actually several other key components that work together to define the flow of work through the system. In addition to statuses and transitions, Jira workflows typically include assignees and resolutions as well.
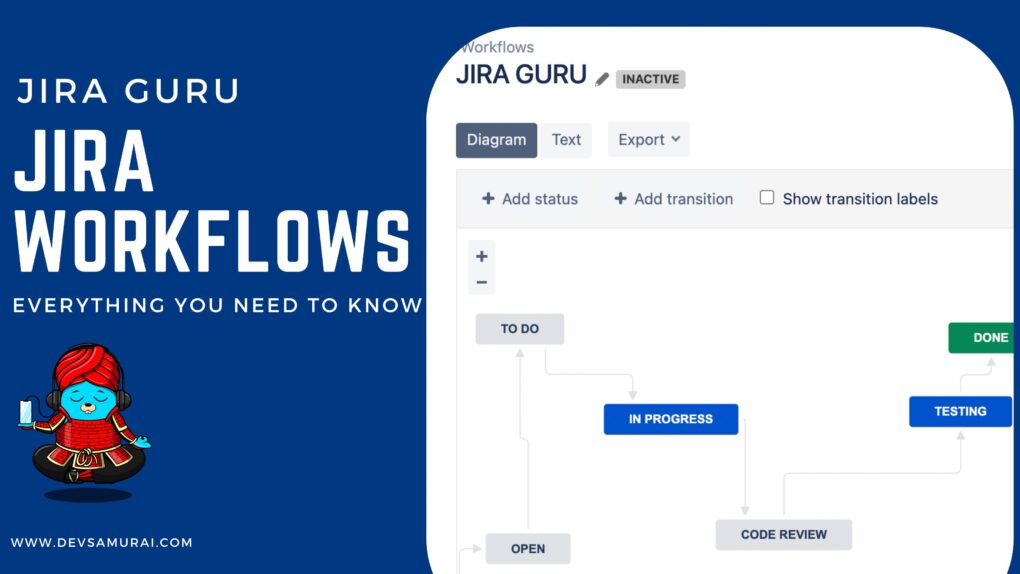
- Statuses: Statuses represent the current state of a Jira issue. They define the different stages that an issue can go through, such as “Open,” “In Progress,” “Ready for Review,” and “Closed.” Statuses can be customized to fit the specific needs of a team or project.

- Transitions: Transitions are the actions that move an issue from one status to another. They define the path that an issue follows through the workflow. For example, a transition might move an issue from the “Open” status to the “In Progress” status when a developer starts working on the issue.
- Assignees: Assignees are the individuals or groups responsible for working on an issue at each stage of the workflow. Assignees can be added and changed as an issue moves through the workflow. For example, a developer might be assigned to an issue when it moves into the “In Progress” status, and a tester might be assigned to the issue when it moves into the “Ready for Testing” status.
- Resolutions: Resolutions define the outcome of an issue. They are typically used when an issue is closed or resolved. For example, a resolution might be “Fixed,” “Won’t Fix,” or “Duplicate.” When an issue is resolved, the resolution is set and the issue moves to a final status like “Closed.”

Jira workflows can be customized to meet the unique needs of a team. For example, a software development team might have a workflow that includes statuses like “To Do,” “In Progress,” “Code Review,” “Testing,” and “Done.” On the other hand, a marketing team might have a workflow that includes statuses like “Planning,” “Drafting,” “Editing,” “Approval,” and “Published.”
Why are Jira workflows important?
Jira workflows are important because they help teams to manage their work effectively. By defining a clear set of rules and processes, workflows ensure that everyone on the team understands what needs to be done and when. This, in turn, leads to better collaboration and higher productivity.
Jira workflows also help teams to track the progress of their work. By defining different statuses, teams can see at a glance where a task or issue is in the workflow. This helps teams to identify any bottlenecks or roadblocks and take action to resolve them.
Additionally, Jira workflows provide a way for teams to enforce best practices and compliance. By setting up conditions for transitions, teams can ensure that certain actions are only taken by specific users or at specific times. This helps teams to maintain consistency and avoid mistakes.
Creating a Jira workflow
Creating a Jira workflow is a straightforward process. Here are the steps you need to follow:
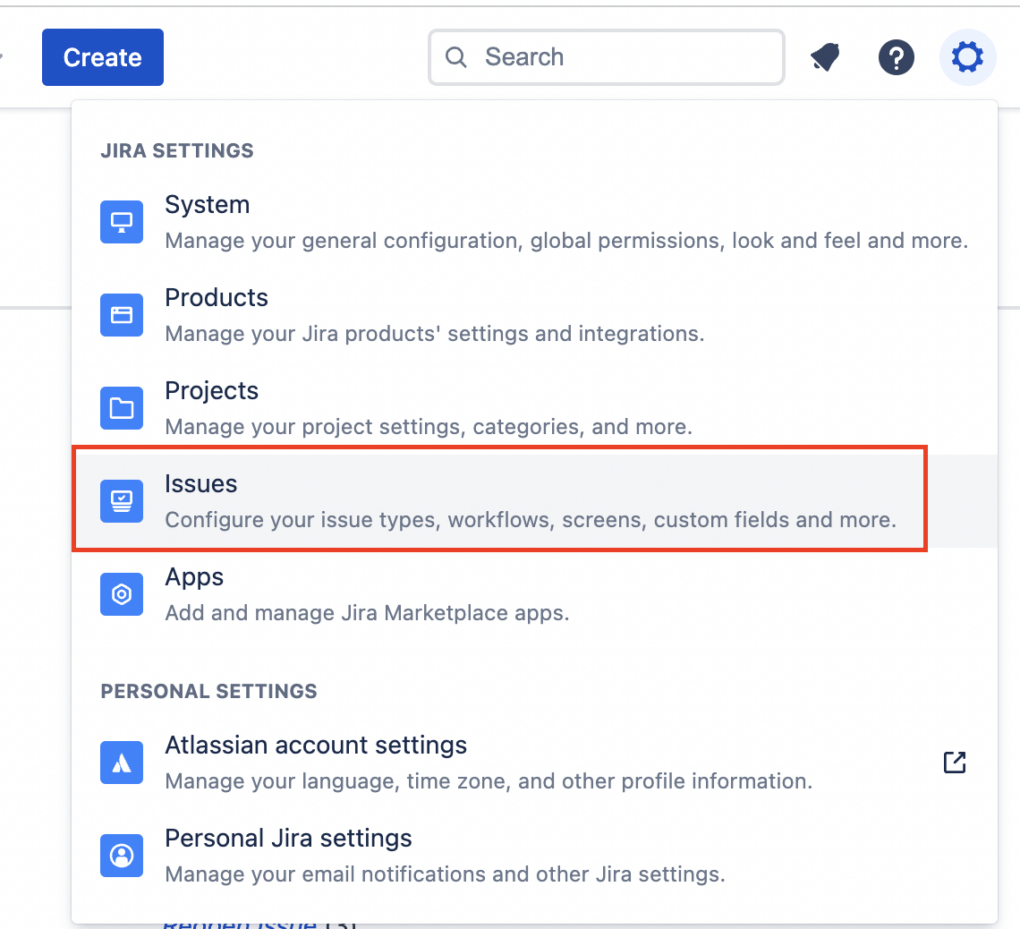
- Go to the Jira Setting and select “Issues”.

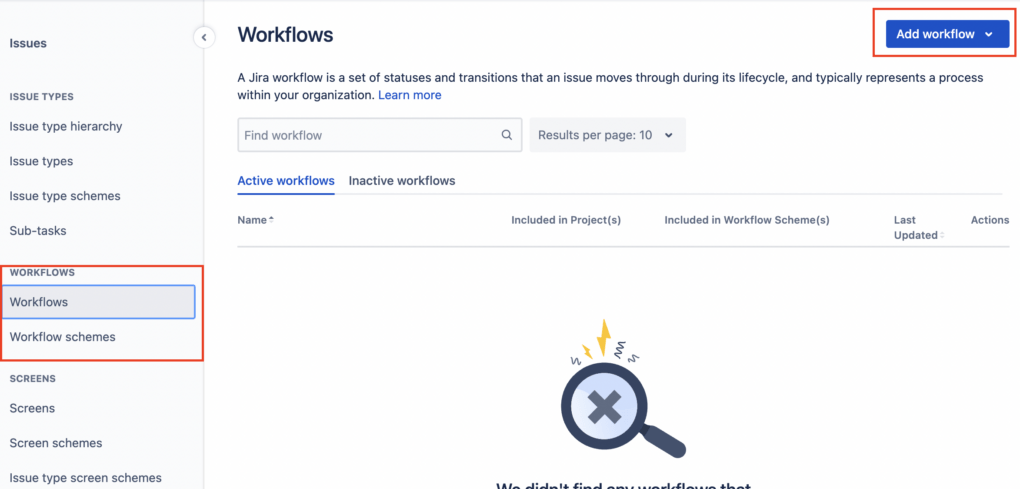
- Click on “Workflows” to view the list of workflows in your Jira instance.
- Click on “Add workflow” button to create a new workflow.

- Use the Add status and Add transition buttons to define statuses and transitions and add them to your workflow. You can define as many of these components as you wish.
- To add resolutions to the workflow, go back to the Issues menu and select the Resolutions button. You will now see a diagram of your workflow. To start customizing your workflow, click on “Edit” in the top-right corner of the screen.
- Once you are satisfied with your workflow, click on “Publish” to make it available to your team.
You can see work with issue workflows on Atlassian
Tips for customizing a Jira workflow
Customizing a Jira workflow involves adding, removing, or modifying the different statuses, transitions, and conditions in the workflow. Here are some tips to help you customize your workflow effectively:
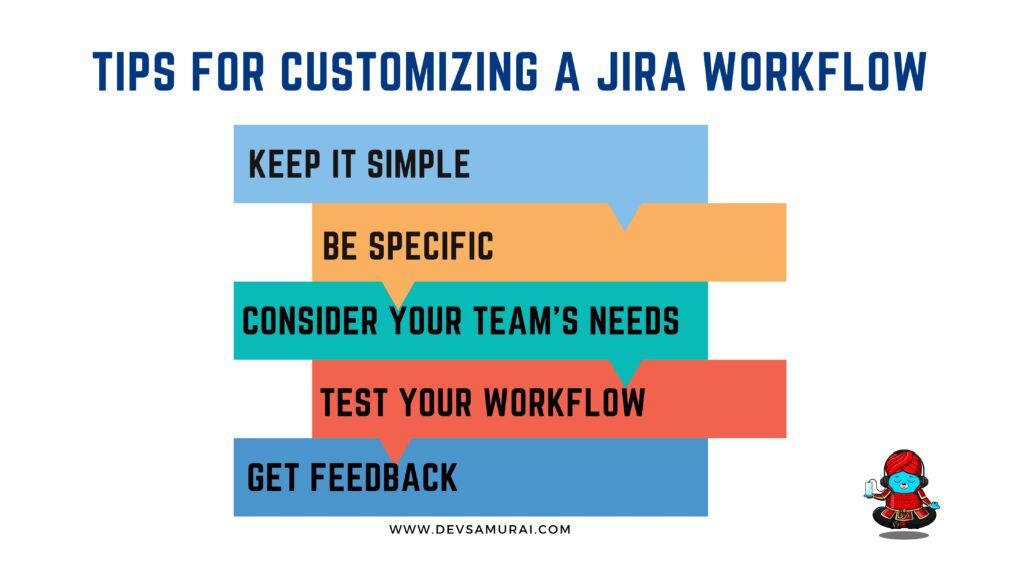
- Keep it simple: Try to keep your workflow as simple as possible. Too many statuses, transitions, and conditions can make it difficult for your team to understand and use the workflow effectively.
- Be specific: Make sure that each status, transition, and condition in your workflow is specific and clear. This will help your team to understand what needs to be done at each stage of the workflow.
- Consider your team’s needs: When customizing your workflow, consider the unique needs of your team. For example, if your team works in an agile environment, you might want to include statuses like “Backlog,” “Sprint Planning,” and “Retrospective.”
- Test your workflow: Before publishing your workflow, make sure to test it thoroughly. This will help you to identify any issues or bottlenecks and make adjustments before your team starts using the workflow.
- Get feedback: Once your workflow is in use, ask your team for feedback. This will help you to identify any areas for improvement and make adjustments as necessary.
Some common mistakes that teams can make
While Jira workflows can be a powerful tool for managing work, there are also some common mistakes that teams can make when creating or customizing their workflows. Here are some of the most common mistakes to avoid:

- Overcomplicating the workflow: One of the most common mistakes that teams make when creating a Jira workflow is overcomplicating the workflow. When a workflow is too complex, it can be difficult for team members to understand and follow. This can lead to confusion, delays, and mistakes. To avoid this mistake, keep your workflow simple and only include the statuses and transitions that are essential.
- Not considering the team’s needs: Another common mistake is not considering the unique needs of the team when creating or customizing the workflow. If the workflow does not align with the team’s way of working, it can be difficult for team members to follow and can lead to frustration. Make sure to involve team members in the process of creating or customizing the workflow and consider their needs and preferences.
- Inconsistent naming conventions: Inconsistent naming conventions can cause confusion and make it difficult for team members to understand the workflow. Make sure to use standard naming conventions for statuses and transitions in your workflow. This will help your team to understand the workflow and use it effectively.
- Failing to test the workflow: Testing the workflow is a crucial step in ensuring that it is effective and meets the team’s needs. Failing to test the workflow can lead to issues and bottlenecks that could have been avoided with proper testing. Make sure to test the workflow thoroughly before publishing it to the team.
- Not getting feedback: Once the workflow is in use, it’s important to gather feedback from team members to identify areas for improvement. Failing to get feedback can lead to a stagnant workflow that does not evolve to meet the changing needs of the team. Make sure to regularly gather feedback from team members and use it to continuously improve the workflow.
By avoiding these common mistakes, teams can create effective and efficient workflows that help them to manage their work effectively. Remember to keep the workflow simple, consider the team’s needs, use consistent naming conventions, test the workflow, and gather feedback from team members. With these best practices in mind, teams can leverage Jira workflows to improve their productivity and deliver high-quality work.
Conclusion, Jira workflows are a powerful tool that can help teams to manage their work effectively. By defining a clear set of rules and processes, workflows provide a structured way to move work through different stages, from creation to completion. Jira workflows can be customized to meet the unique needs of a team and can be used to track the progress of work, enforce best practices, and ensure compliance.
Creating and customizing Jira workflows is a straightforward process, but it’s important to follow best practices to ensure that your team gets the most out of the workflow. By keeping your workflow simple, being specific, considering your team’s needs, testing your workflow, and getting feedback, you can create a workflow that helps your team to work more efficiently and effectively.