One of the pivotal features that make Jira exceptionally user-friendly and versatile is its “Gadgets”. Gadgets in Jira act as the building blocks that allow users to create a customized dashboard displaying pivotal project-related information, crucial for decision-making and project monitoring.
In this tutorial, we will delve deep into the world of Jira Gadgets, exploring their versatility and how they can be tailored to suit individual project needs. From understanding their fundamental nature to setting them up on your dashboard and integrating them with marketplace apps for enhanced functionality, this guide is designed to be a comprehensive resource for both new and experienced Jira users. So, let’s embark on this journey and uncover the myriad possibilities that Jira Gadgets unfold.
A. Understanding Jira Gadgets
Jira Gadgets are versatile components within the Jira ecosystem that play a crucial role in customizing user experiences, enabling users to visualize and interact with data and information more efficiently. They act as the backbone of a user’s dashboard, providing a tailored view that aids in effective decision-making and streamlined project monitoring. Below, we unravel the essence of Jira Gadgets, their varied types, and the plethora of functionalities they offer.
I. Core Functionality
Jira Gadgets are interactive modules that present a snapshot of a user’s project-related data. They offer real-time insights, analytics, and representations, allowing users to stay abreast of project progress, issues, and developments. The core functionality of gadgets is to enable users to create a consolidated view of essential project metrics and information, ensuring efficient project management and monitoring.
II. Types of Gadgets in Jira
Jira gadgets can be broadly categorized based on their purpose and visualization type. Here are some of the main types of gadgets, categorized by their primary function or format:
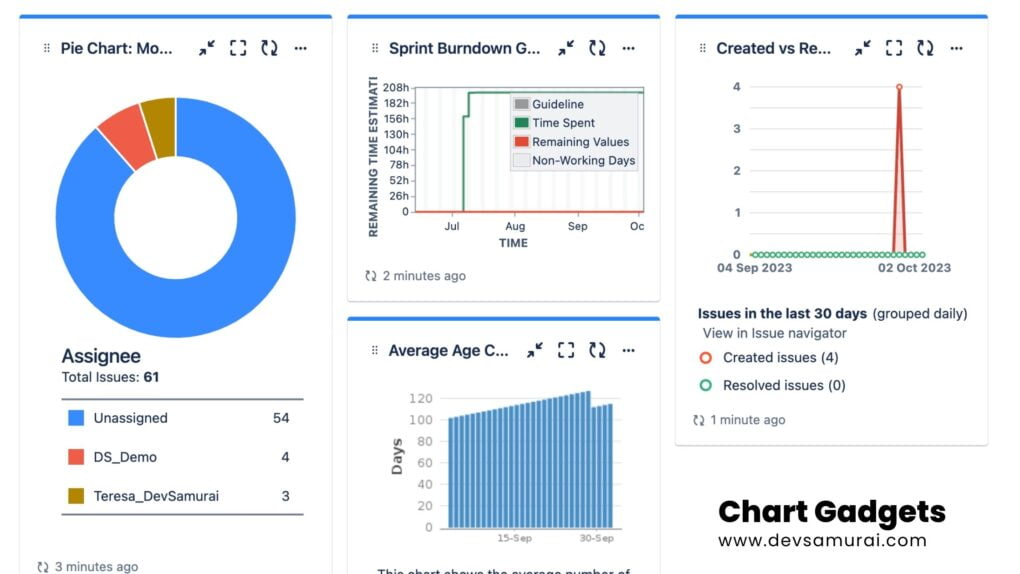
1. Chart Gadgets:
- Pie Chart Gadget: Represents issues in a pie chart format based on selected criteria.
- Burndown Chart Gadget: Used in Agile methodologies to show the remaining work against time.
- Created vs. Resolved Chart Gadget: Shows the number of issues created vs. those resolved over time.
- Average Age Chart Gadget: Displays the average age of unresolved issues over a specified period.
- Bubble Chart: Bubble Charts help you identify popular and significant issues by displaying data in four dimensions.
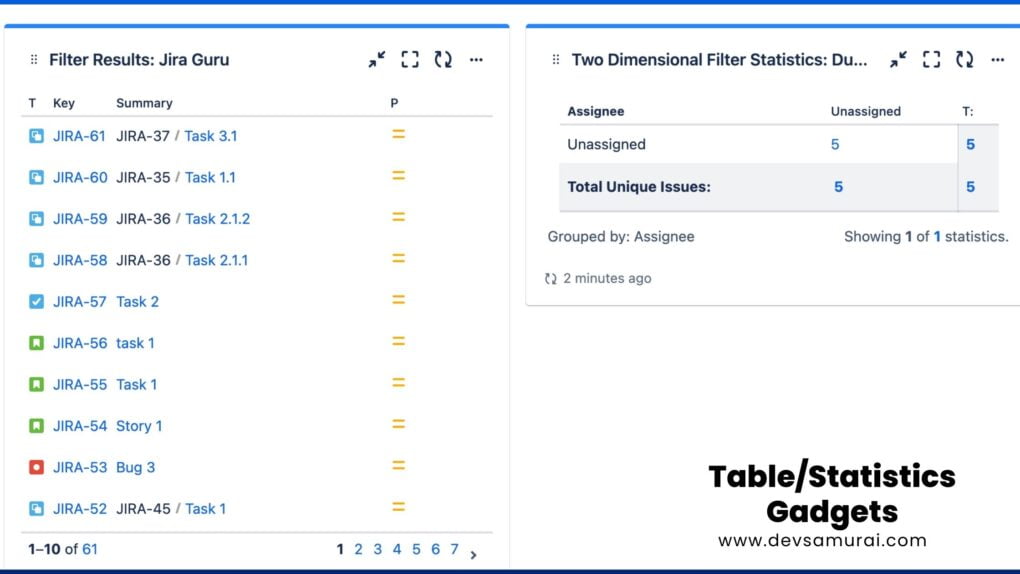
2. Table/Statistics Gadgets:
- Filter Results Gadget: Displays a list of issues based on a particular filter.
- Two Dimensional Filter Statistics Gadget: Shows issues based on two selected fields, providing a matrix-like view.
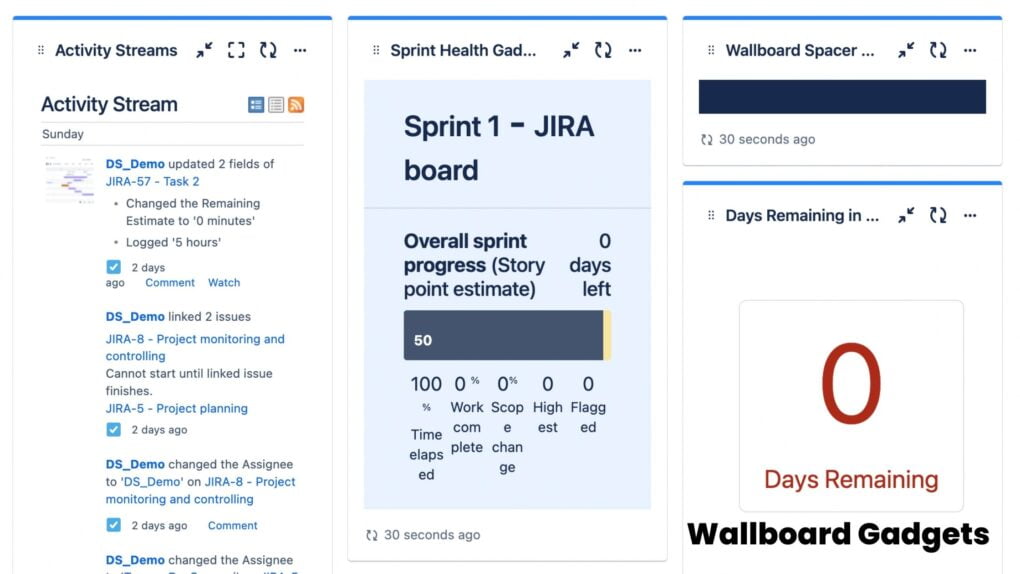
3. Wallboard Gadgets:
- Activity Stream: Lists recent activity in a single project, or in all projects.
- Days Remaining in Sprint Gadget: Displays days remaining in a sprint (Wallboard capable)
- Sprint Health Gadget: Visual snapshot of the health of a sprint (Wallboard capable)
- Sprint Burndown Gadget: Sprint burndown chart to track remaining work (Wallboard capable)
- Wallboard Spacer Gadget: Allows for custom spacing between gadgets in a wallboard
4. Calendar and Time-tracking Gadgets:
- Calendar Gadget: Shows issues on a monthly calendar based on their due dates.
- Workload Pie Chart Gadget: Visualizes workload distribution among team members.
- Days Remaining Gadget: Used in Agile boards to display the number of days remaining in the current sprint.
- Time Since Chart: Displays the time since a chosen field for each issue for a project or saved filter.
- Time to First Response: Displays the number of hours taken to respond to issues for a project or filter.
![]()
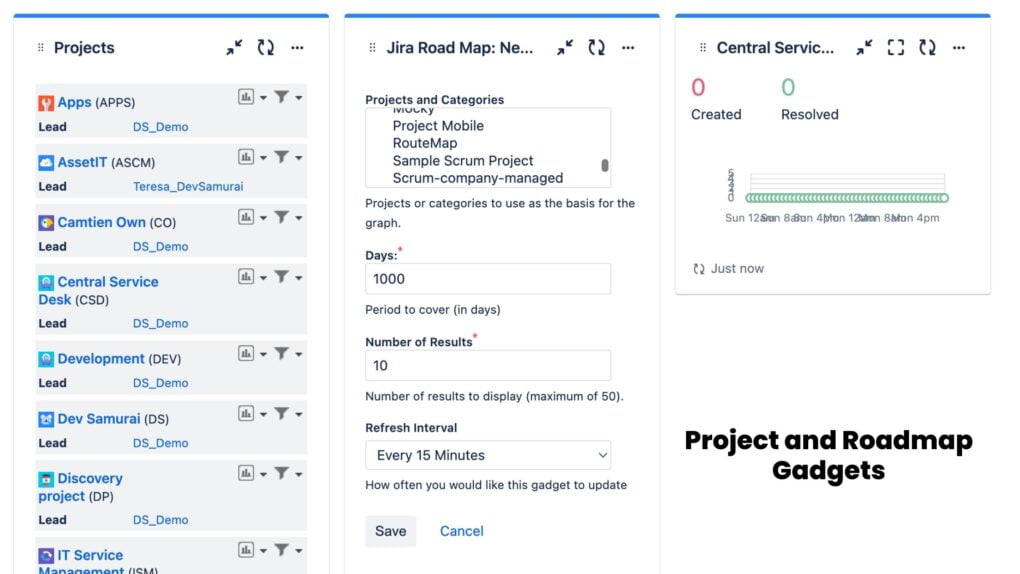
5. Project and Roadmap Gadgets:
- Heat Map Gadget: Displays the matching issues for a project or filter as a heat map.:
- Projects Gadget: List multiple projects
- Jira Road Map Gadget: Displays the upcoming versions/releases for a project and associated issues.
- Service project report: Displays a custom or knowledge base report from a service project.
6. User-focused Gadgets:
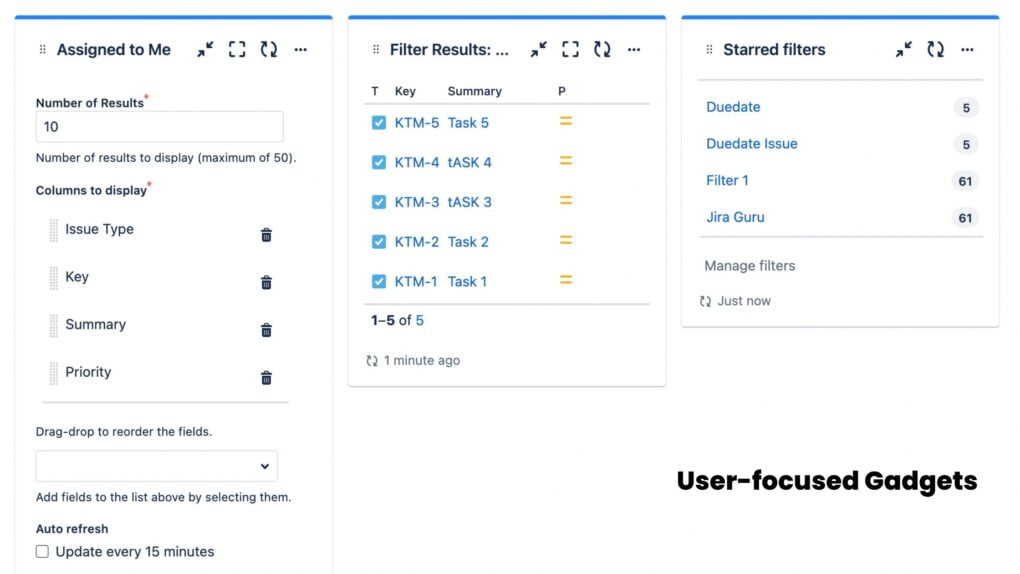
- Assigned to Me Gadget: Lists all the issues currently assigned to the logged-in user.
- Starred filters: Lists the current user”s starred filters.
- Filter Results: Shows the issues/results for a saved filter.
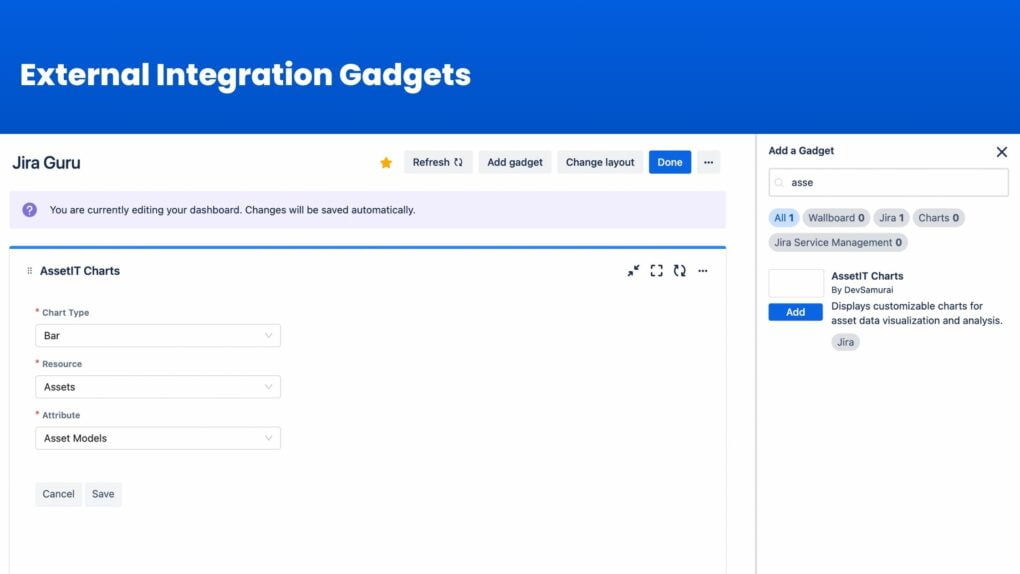
7. External Integration Gadgets:
These gadgets pull data from external tools integrated with Jira. For example, if you’ve integrated Jira with AssetIT, you might have an AssetIT Gadget by DevSamurai to display build statuses.
III. Value Proposition
Understanding Jira Gadgets is pivotal as they empower users to:
- Enhance Visibility: Gadgets provide a clear and concise view of project status, upcoming tasks, and potential bottlenecks.
- Improve Productivity: By having all essential information at a glance, users can prioritize tasks effectively and allocate resources more efficiently.
- Facilitate Quick Decision-Making: Real-time insights and analytics enable users to make informed decisions promptly, minimizing delays and improving project outcomes.
- Customize User Experience: The versatility of gadgets allows users to tailor their dashboards according to their preferences and project requirements, ensuring a more user-friendly and efficient experience.
IV. User Customization and Interaction
Users can customize the layout, content, and appearance of gadgets to suit their individual needs and preferences, ensuring a more interactive and personalized experience. Interaction with gadgets is typically intuitive, allowing users to filter, sort, and analyze data with ease. Customization and interaction are vital as they allow users to mold their dashboards into a powerful tool that aligns perfectly with their project goals and management style.
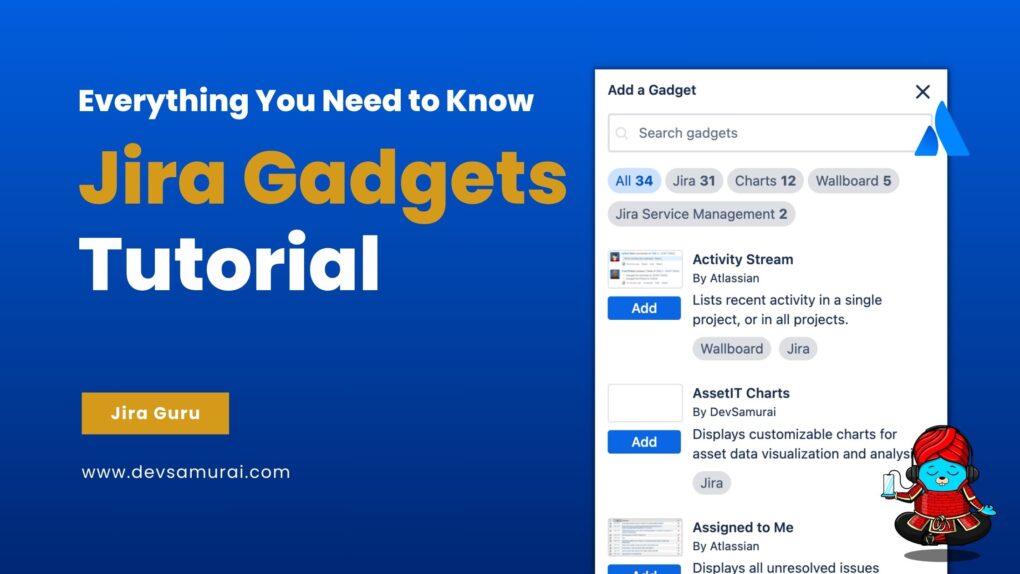
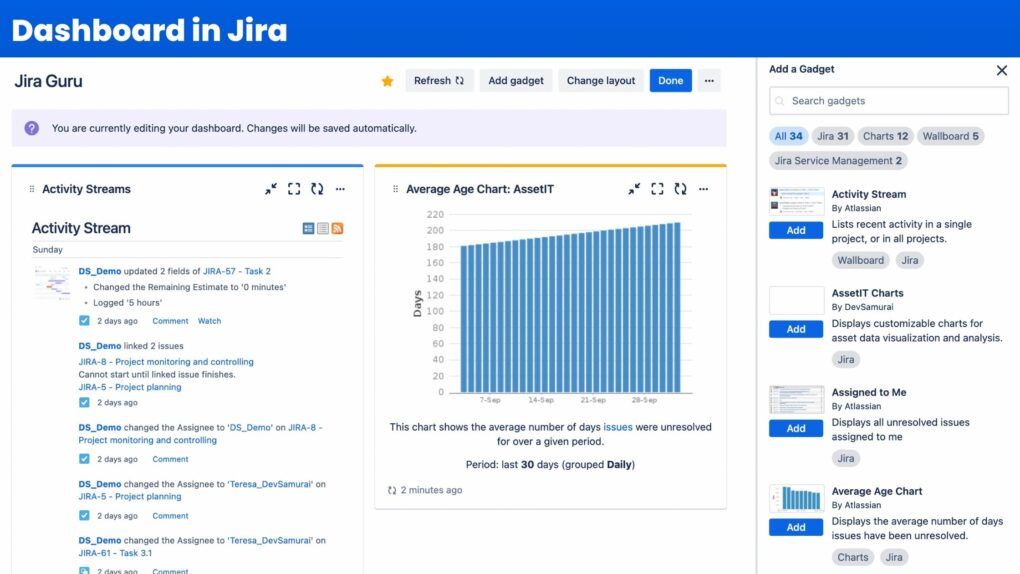
B. Setting Up Gadgets in Jira Dashboard
Setting up Gadgets on your Jira Dashboard is a fundamental step to streamline your workflow and get the most out of Jira’s features. The process is quite user-friendly and customizable, allowing you to create a dashboard that mirrors your needs and preferences accurately. Below is a structured guide to help you set up gadgets in your Jira Dashboard effortlessly.
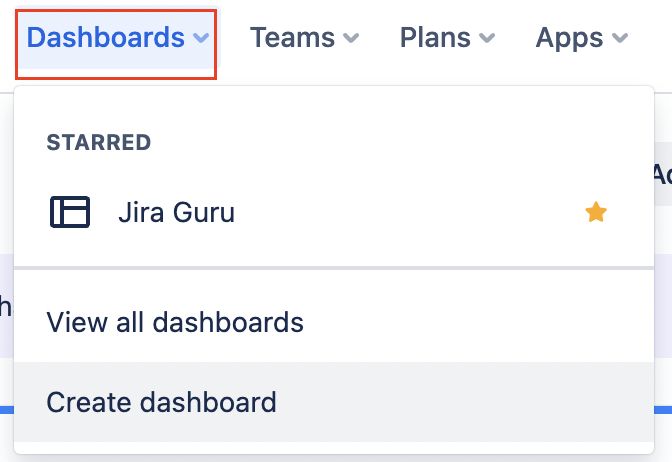
I. Accessing the Dashboard:
- Log in to your Jira account.
- Navigate to your dashboard by selecting ‘Dashboards’ from the top navigation menu.
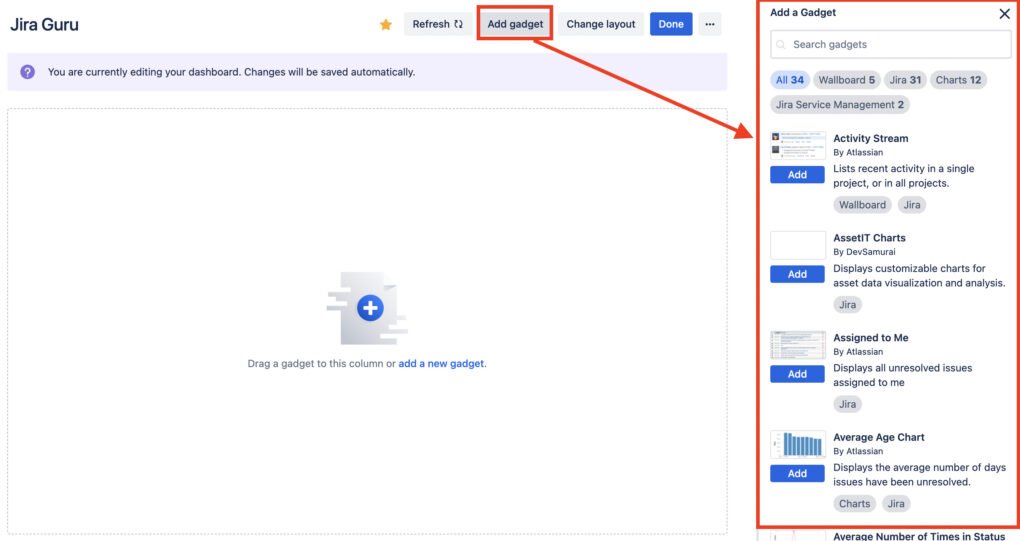
- Once on the dashboard, look for the ‘Add Gadget’ button, usually located at the top right corner or in a ‘…’ menu, depending on your Jira version.
- Search for the gadgets that align with your project needs and preferences.
- Once you’ve found the desired gadget, click the ‘Add’ button next to it.
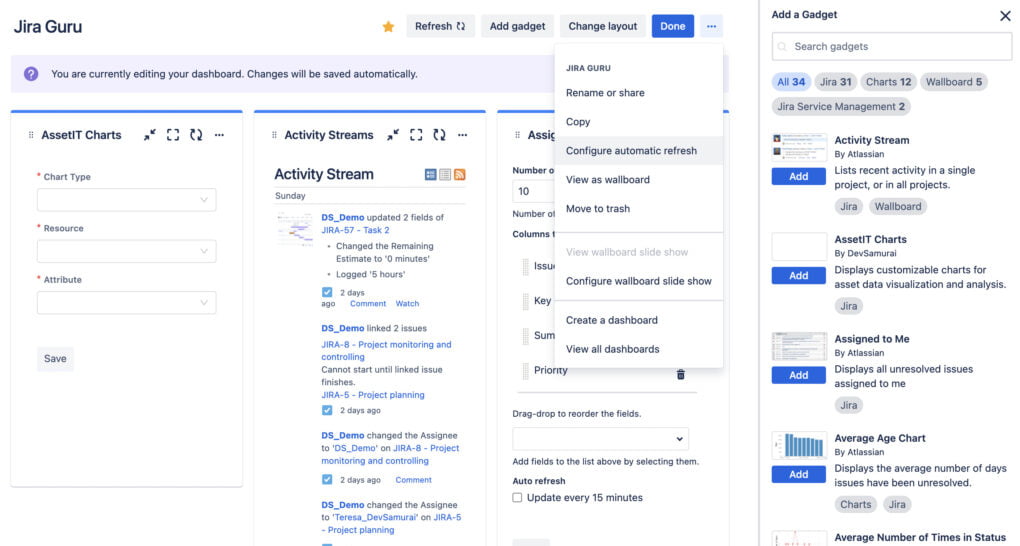
II. Configuring Gadgets:
- Some gadgets may require additional configurations, such as linking to specific project data or adjusting display settings.
- Look for a ‘Configure’ option or a settings icon on the gadget.
- Follow the prompts to adjust the settings as per your needs.
- Gadgets can be rearranged by simply dragging them to the desired position on the dashboard.
- To remove a gadget, look for a ‘Delete’ or a trash icon on the gadget and confirm the removal.
- Change layout
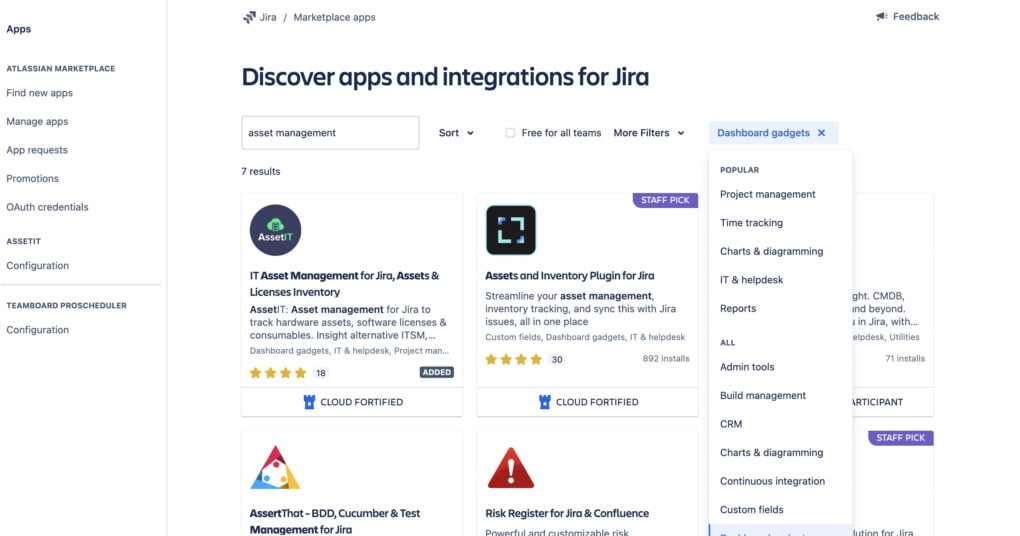
C. External Integration Gadgets
If you find that a gadget you are seeking is not available or not already installed in Jira Software, you have the option to explore the Atlassian Marketplace. The Marketplace is a reservoir of numerous apps and gadgets developed by Atlassian and third-party developers to extend the functionality of Jira Software. Here’s a concise guide on how to find and install gadgets from the Atlassian Marketplace.
- Go to Marketplace App: Select ‘Apps’ > ‘Explore new apps’.
- Use the search bar in the Marketplace to type in keywords related to the gadget you are looking for.
- Refine your search using filters such as categories => “Dashboard gadgets”.
- Installing Gadgets: If the gadget seems fit for your requirements, click the ‘Install’ button and follow the on-screen instructions to add it to your Jira Software.
- Configuring Installed Gadgets
D. Troubleshooting and Optimization
When utilizing gadgets in Jira, users might occasionally encounter issues or performance bottlenecks. Knowing how to troubleshoot common problems and optimize gadgets is crucial for maintaining a smooth and efficient project management experience. Below is a comprehensive guide on troubleshooting common issues and optimizing gadget configurations in Jira.
I. Resolving Common Gadget Issues:
Identifying the Issue:
- Determine whether the problem is with the gadget’s functionality, display, or data representation.
- Check Jira logs for any error messages or hints related to the malfunctioning gadget.
Consulting Documentation and Forums:
- Refer to the official documentation or community forums for solutions or advice on identified issues.
- Check if the issue is a known bug and if any fixes or workarounds are available.
Reconfiguration and Reinstallation:
- Try reconfiguring the gadget settings or reinstalling the gadget to resolve any configuration or installation-related issues.
- Ensure that the gadget is compatible with your Jira version and other installed plugins.
II. Optimizing Gadget Configuration:
Reviewing and Adjusting Settings:
- Regularly review gadget configurations to ensure they align with your current project needs and preferences.
- Adjust settings, filters, and display options to optimize the gadget’s utility and relevance.
Maximizing Resource Efficiency:
- Monitor the resource usage of gadgets, especially custom and external ones, to ensure they do not impact Jira’s performance.
- Optimize gadget configurations to minimize resource consumption while maintaining functionality.
In conclusion, mastering Jira gadgets is paramount for anyone striving to fully leverage Jira’s capabilities. Whether you’re looking to streamline your project management process, increase visibility into your projects, or simply elevate your overall Jira experience, understanding, and effectively utilizing these gadgets is key. Remember, the journey doesn’t stop here; keep exploring, experimenting, and optimizing to tailor your Jira environment precisely to your unique needs, ensuring your projects are managed more intuitively and efficiently. May this tutorial serve as your compass in navigating the vibrant ecosystem of Jira gadgets, propelling you toward unparalleled project management success.