Managing a backlog can be a challenging task for any team. With so many tasks to complete and so little time to complete them, it’s easy to lose track of priorities and deadlines. This is where Jira Software comes in. Jira Software is a powerful tool for managing backlogs, and it’s used by teams all over the world to streamline their workflows and stay organized. In this blog post, we’ll provide a step-by-step guide on how to manage your backlog with Jira Software.
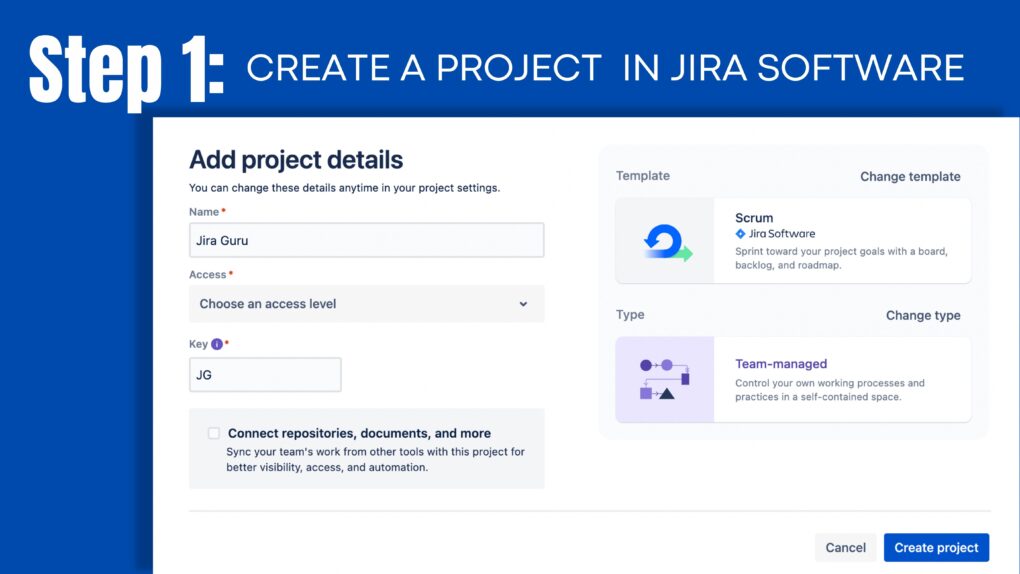
Step 1: Create a Project in Jira Software
The first step in managing your backlog with Jira Software is to create a project. A project is a container for all of the issues, tasks, and stories that you need to complete. To create a project in Jira Software, simply click on the “Projects” menu and select “Create Project.” From there, you’ll be able to select a project type, name your project, and add a project description. You can also set up project permissions and select a project template if you’d like.
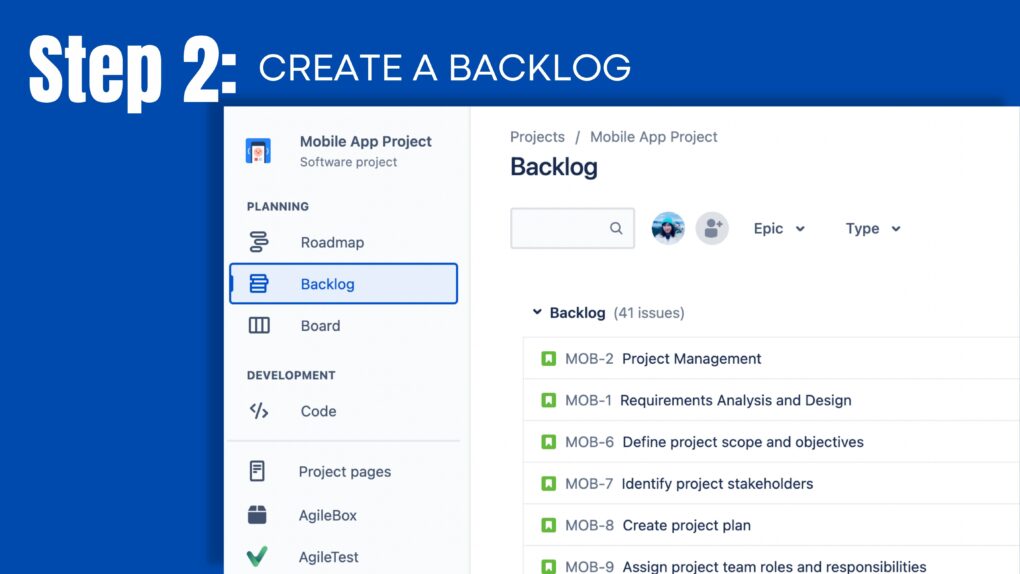
Step 2: Create a Backlog
Once you have created your project, the next step is to create a backlog. A backlog is a list of tasks that need to be completed in the project. To create a backlog, click on the “Backlog” tab in the project menu. This will take you to the backlog page where you can view and manage your backlog.
Step 3: Add Backlog Items
To add items to your backlog, click on the “Create” button at the top of the backlog page. This will open a menu where you can select the type of item you want to add. Jira Software allows you to add four types of backlog items: Epics, Stories, Bugs, and Tasks.
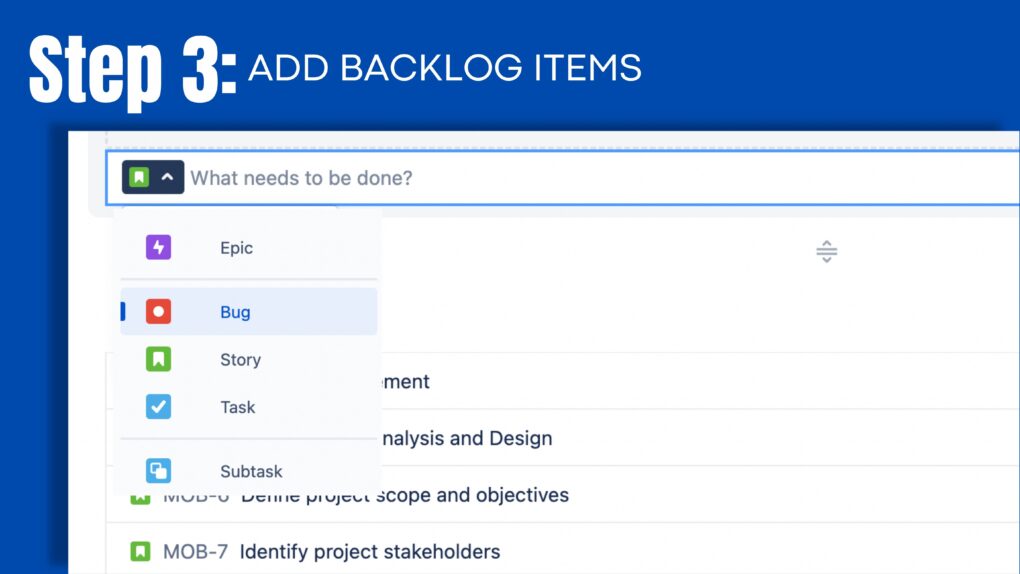
- Epics: Epics are high-level initiatives that can be broken down into smaller stories or tasks. They are used to represent large chunks of work that may take several sprints to complete.
- Stories: Stories are user-focused features or requirements that need to be implemented. They are usually smaller than epics and can be completed within a sprint.
- Bugs: Bugs are issues or defects that need to be fixed in the project. They can be added to the backlog and prioritized like any other item.
- Tasks: Tasks are small, specific items that need to be completed to achieve a larger goal. They are usually the smallest items in the backlog.
Once you have selected the type of item you want to add, enter the details of the item such as the summary, description, and priority. You can also assign the item to a team member and set a due date.
Step 4: Prioritize Your Backlog
Prioritizing your backlog is an important step in backlog management. This ensures that the most important items are tackled first, and the team is working on the items that will have the biggest impact on the project. Jira Software provides several ways to prioritize your backlog:
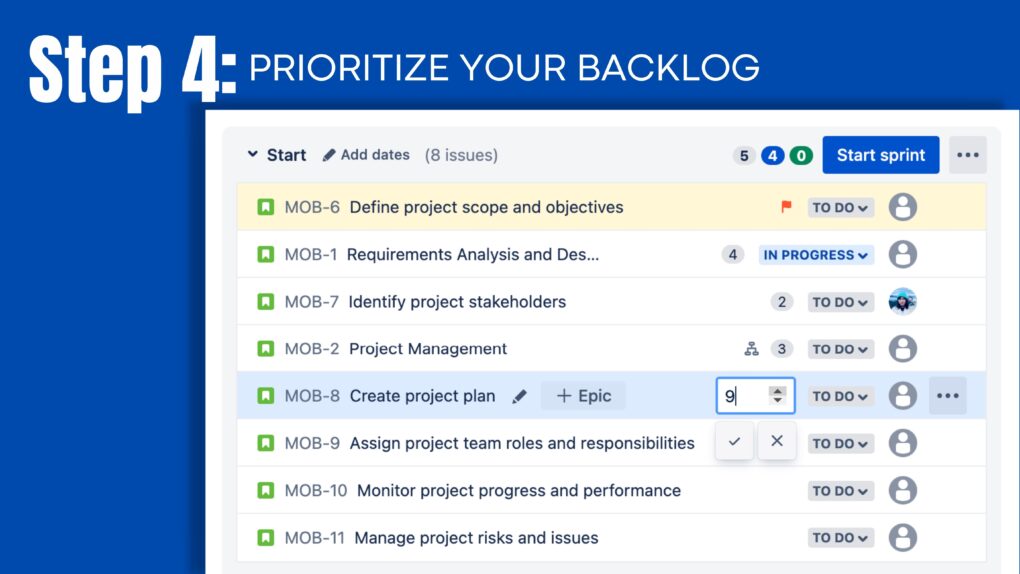
- Drag and Drop: You can drag and drop items in the backlog to reorder them based on priority. Simply click and hold the item, and drag it to the desired position in the list.
- Priority Field: Jira Software allows you to set a priority field for each item in the backlog. This field can be used to rank items based on their importance.
- Ranking Field: Jira Software also provides a ranking field that allows you to rank items based on their importance. This field can be used to override the priority field if necessary.
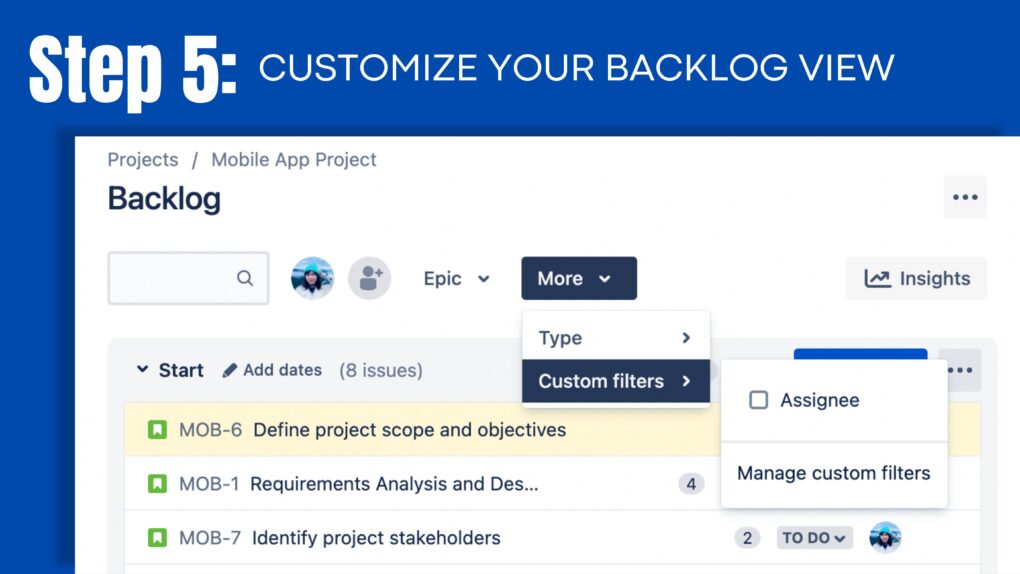
Step 5: Customize Your Backlog View
Jira Software provides several ways to customize your backlog view to suit your team’s needs. These include:
- Board View: The board view allows you to view your backlog items in a visual format, such as a Kanban board or a Scrum board. This view is useful for teams that use Agile methodologies.
- Filters: Jira Software also allows you to filter your backlog items based on various criteria such as assignee, priority, and status. This is useful for teams that want to focus on specific items or view the backlog in a specific way.
- Custom Fields: Jira Software allows you to add custom fields to your backlog items. This is useful for teams that want to add additional information or track specific metrics.
- Quick Filters: Quick filters are a quick and easy way to filter your backlog items based on common criteria such as status or assignee. These filters can be customized to suit your team’s needs.
Example: We’re going to go under Quick Filters and call Assignee.. In our query for this filter, our JQL is going to be Assignee= CurrentUser(). to match the name we gave the component we created and assigned. We can also put a description if we want to. Next, we’ll hit the Add button, and we’ll have created a quick filter called Assignee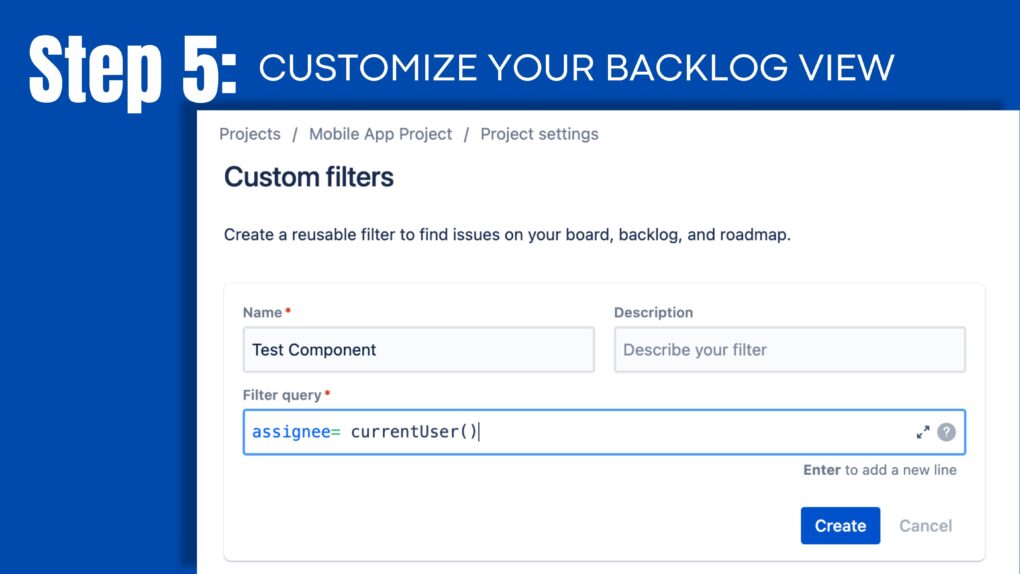
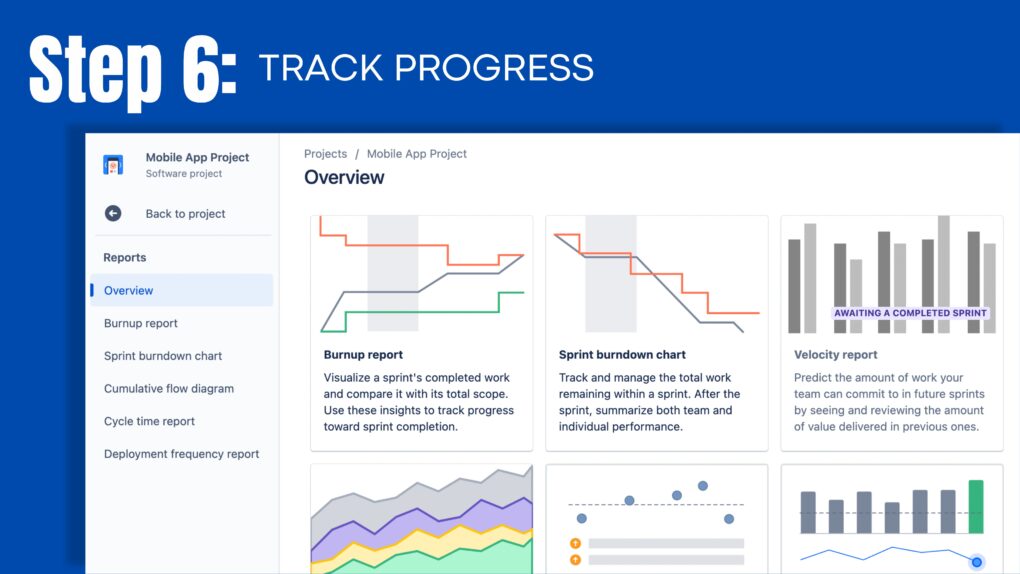
Step 6: Track Progress
Once you have set up and customized your backlog in Jira Software, the next step is to track progress. Jira Software provides several ways to track progress, including:
- Sprint Planning: Jira Software allows you to plan sprints and assign backlog items to each sprint. This is useful for teams that use Agile methodologies and work in sprints.
- Burndown Charts: Burndown charts provide a visual representation of the team’s progress during a sprint. Jira Software allows you to generate burndown charts for each sprint, which can be used to track progress and identify any issues or delays.
- Reports: Jira Software provides several reports that can be used to track progress and identify trends. These reports include the Sprint Report, the Velocity Chart, and the Control Chart.
in Conclusion, Managing a backlog can be a complex task, but with the right tools and processes in place, it can be made easier. Jira Software provides a powerful tool for managing backlogs, and by following the steps outlined in this guide, you can set up and customize your backlog to suit your team’s needs. By prioritizing tasks, tracking progress, and customizing your backlog view, you can ensure that your team is working on the most important items and making progress towards your project goals.
About DevSamurai
DevSamurai is a Global IT service company that provides DevOps solutions for Jira, Atlassian and more… using cutting-edge technology to its growing customer base. DevSamurai is customer-centric and helps clients to leverage the power of IT to improve their business. DevSamurai use cloud computing platforms, DevOps tools, and best practices in global industry standards to guarantee the efficiency of their clients’ organization.