Navigating user permissions in Jira can be as crucial as steering the project itself. As one of the leading project management tools, Jira provides two primary ways to manage access: Jira groups and Jira roles. While both are central to user management, they differ significantly in application and impact.
Jira groups are collections of users that simplify global permission settings across multiple projects. Jira roles, in contrast, offer finer control, allowing for permissions to be tailored to specific projects and teams.
The nuances between Jira groups and Jira roles are not just administrative details, they’re essential for leveraging Jira’s capabilities to the fullest. This blog will demystify these concepts, highlighting the key differences to equip you with the knowledge to use each effectively. Whether you’re allocating tasks, securing sensitive data, or managing a cross-functional team, understanding the distinct roles these settings play will streamline your project management efforts in Jira. Let’s clarify the unique purposes and advantages of Jira groups and Jira roles, paving the way for a more structured and efficient workflow.
What is Jira Group?
1. Definition of Jira Groups
Jira groups are essentially a cluster of users banded under a single label. Every user added to a group inherits the permissions assigned to that group. It’s a global concept, meaning these groups are not confined to a particular project but span across the whole Jira instance.
2. Purpose of Groups in Jira
The primary purpose of groups in Jira is to manage permissions at a macro level. Groups are used for a variety of reasons, such as:
- Access Control: Restricting or granting access to Jira projects, dashboards, and filters.
- Ease of Administration: Simplifying the management of user rights by bulk-assigning permissions.
- Notification Management: Sending bulk notifications to users within a group.
- Integration: Working with other Atlassian products or add-ons where permissions need to be aligned across multiple tools.
3. Typical Uses for Groups
Groups are commonly used for defining roles like “Developers,” “Project Managers,” or “QA Testers,” and granting permissions accordingly. They’re particularly useful when you want to give a set of users access to multiple projects or categories within Jira.
4. Pros and Cons of Using Jira Groups
Here are some advantages and disadvantages associated with the use of groups:
Pros:
- Simplicity: Easy to set up and manage for administrators.
- Broad Application: Ideal for company-wide policies or when the same level of access is needed across different projects.
- Time-saving: Permissions need to be configured only once for the group, not individually for each user.
Cons:
- Lack of Granularity: Not suitable for managing detailed permissions needed by different team members within the same project.
- Risk of Over-Permission: It’s easy to inadvertently grant excessive permissions if a user is part of multiple groups with overlapping access rights.
- Scalability Issues: As the number of users grows, managing groups and their permissions can become complex and unwieldy.
What is Jira Role?
1. Definition of Jira Roles
Jira roles are flexible designations that can be assigned to users or groups within the context of an individual project. Unlike Jira groups, roles do not carry any permissions on their own. Instead, they act as placeholders to which permissions are applied within the scope of a single project’s permission scheme.
2. Purpose of Roles in Jira
Roles are intended to provide a fine-tuned permission model that reflects the various responsibilities and access needs of users within a particular project. They enable project admins to:
- Assign and manage user permissions on a project-by-project basis.
- Allow for the easy addition or removal of users in a role, without the need to modify the underlying permission scheme.
- Facilitate project-specific reporting, notifications, and workflow functions.
3. Typical Uses for Roles
Commonly established roles in Jira include “Project Lead,” “Tester,” “Developer,” or “Documentation Writer.” These roles allow for granular control over who can do what within a project, such as who can assign issues, who can transition issues, and who can view certain project components.
4. Pros and Cons of Using Jira Roles
The use of roles comes with its set of benefits and challenges:
Pros:
- Granular Control: Enables precise permission management tailored to individual project needs.
- Flexibility: Users can easily be added or removed from roles without affecting global permissions or other projects.
- Scalable: Roles can be reused across different projects, making it easier to manage large numbers of users and complex permission requirements.
Cons:
- Complexity: Setting up roles requires a deeper understanding of Jira’s permission scheme and can be more complex to manage than groups.
- Administration: Each project may require its own set of roles, which can increase the administrative burden for project leads.
- Risk of Under-Permission: If roles are not properly managed, users may end up with fewer permissions than needed, potentially hindering their workflow.
Key Differences Between Jira Groups and Roles
| Aspect | Jira Groups | Jira Roles |
| Scope | Global: Affects the entire Jira instance. | Project-specific: Only affects individual projects. |
| Permission Level | Broad: Grants permissions across multiple projects. | Granular: Tailors permissions to project needs. |
| Management | Simpler for small-scale; complex as size increases. | Initially complex; scalable for large setups. |
| Flexibility | Less adaptable to changes; affects all projects. | Highly adaptable to project-specific changes. |
| Best Used For | General access rights across the system. | Detailed, project-tailored access management. |
| Notifications | Global notifications, risk of over-notification. | Targeted, project-specific notifications. |
| Administration | Less overhead at small scale; can be unwieldy later. | More setup but easier to manage in dynamic settings. |
| Scalability | Can become complex with more users/groups. | Easily handles expanding teams and permissions. |
| Communication Flow | Can lead to irrelevant updates for some users. | Ensures information relevance and reduces noise. |
Please note that this table simplifies some aspects for brevity. In practice, Jira administrators might find that there are additional nuances and considerations when working with groups and roles in Jira.
Practical Scenarios: When to Use Groups vs. Roles
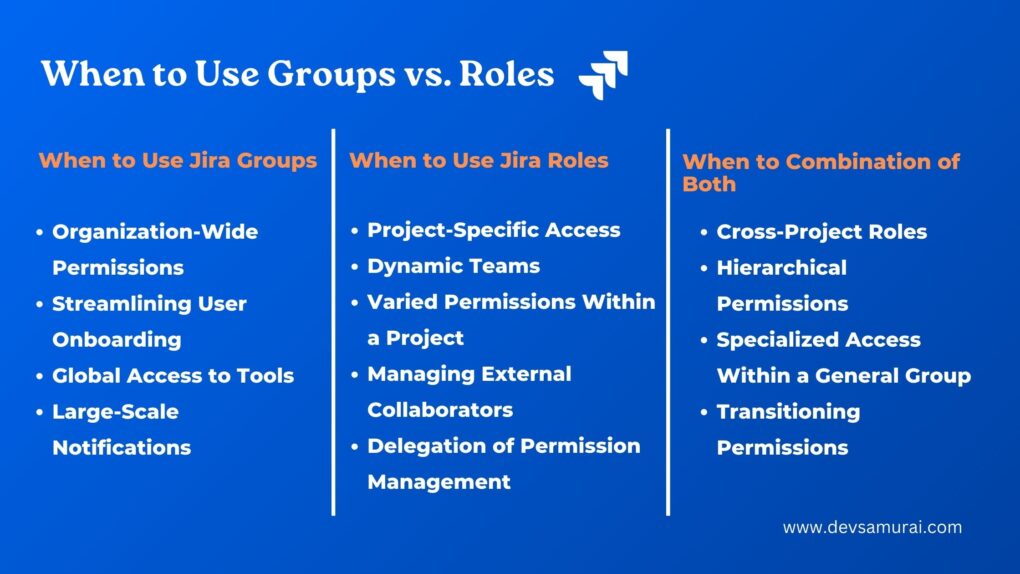
1. When to Use Jira Groups
- Organization-Wide Permissions: When a set of permissions needs to be granted across the entire organization, such as allowing all employees to log in and create issues.
- Streamlining User Onboarding: For new employees who need a standard set of permissions as soon as they join, adding them to a pre-defined group speeds up the onboarding process.
- Global Access to Tools: When users need access to multiple tools integrated with Jira, groups can be used to manage these permissions centrally.
- Large-Scale Notifications: To broadcast information relevant to all users in a group, such as company-wide updates or system maintenance notifications.
2. When to Use Jira Roles
- Project-Specific Access: When team members require access to resources that are only relevant to their project work.
- Dynamic Teams: In scenarios where team members are frequently added or removed from projects, roles make it easy to update permissions accordingly.
- Varied Permissions Within a Project: To manage different levels of access within the same project, such as distinguishing between developers, testers, and project managers.
- Managing External Collaborators: When external partners or contractors need access to a project, roles can provide the necessary permissions without granting broader access that comes with groups.
- Delegation of Permission Management: Allowing project leads to manage their own team’s permissions without granting them full administrative access over the Jira instance.
3. Scenarios Requiring a Combination of Both
- Cross-Project Roles: Combining groups and roles can be efficient, such as creating a group for all testers and then assigning this group to a testing role in multiple projects.
- Hierarchical Permissions: Using groups for basic access permissions while utilizing roles for more nuanced permissions within those groups.
- Specialized Access Within a General Group: For users who are part of a large group but need additional permissions in specific projects, a combination of group membership with project role assignments works best.
- Transitioning Permissions: During organizational changes, transitioning from a group-based to a role-based permission model (or vice versa) can be managed progressively by leveraging both systems.
How to create Jira Groups and Jira Roles?
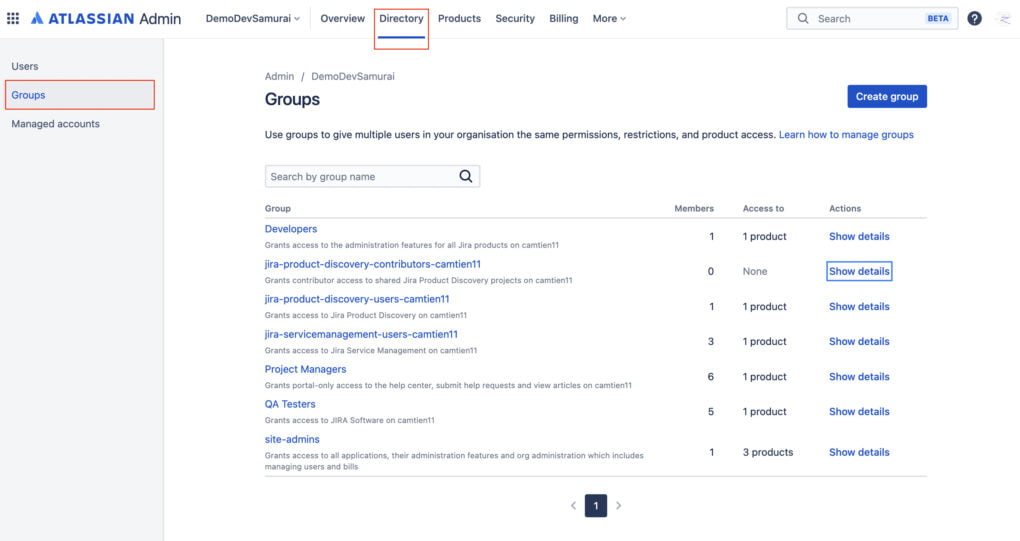
Creating Jira Groups
Go to your organization at admin.atlassian.com and select Directory.
- Look for a section or tab labeled ‘Groups’ to create a New Group
- There should be an option to ‘Create group’. Click on it.
- Enter a name for your new group.
- Add Users to the Group
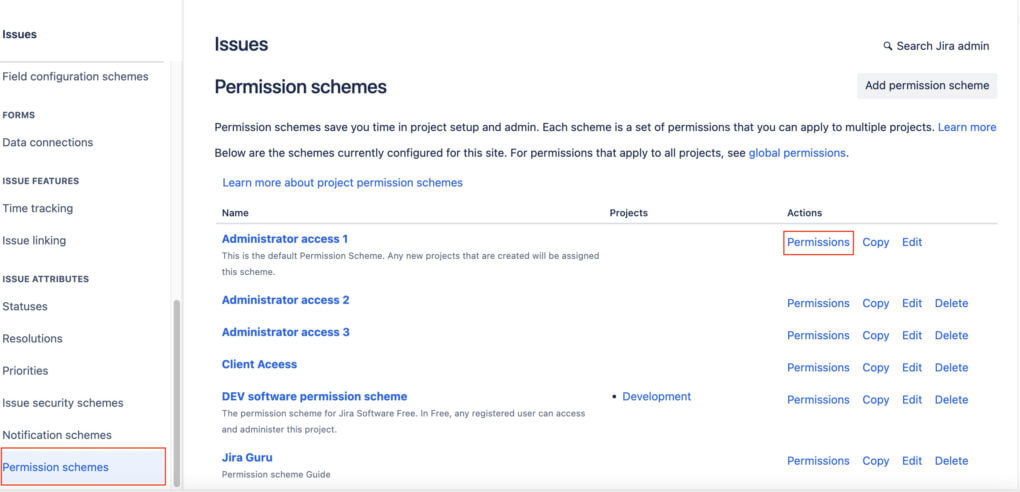
- Apply the Group to Permission Schemes
Creating Jira Roles:
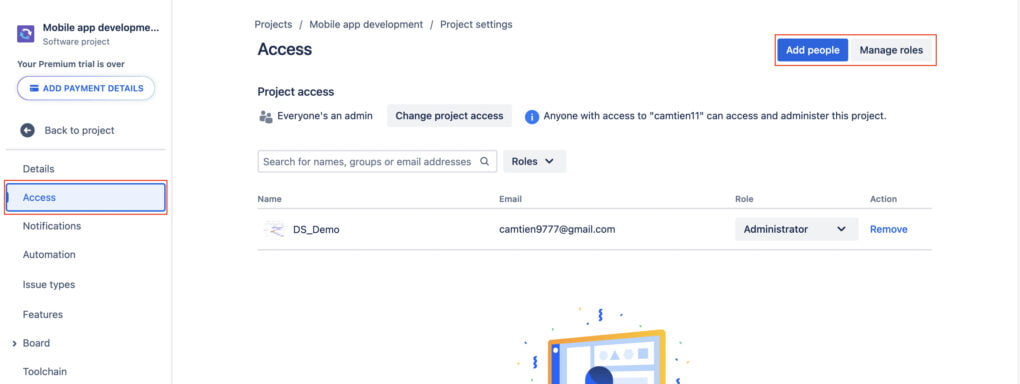
- Go to Project Settings:
- Select the project where you want to create the role from the ‘Projects’ menu. Then go to ‘Project settings’.
- Access Roles Section
- Add a New Project Role
- Name and Define the Role
- Associate Users or Groups with the Role:
- Apply the Role to Permission Schemes
Remember that roles are project-specific in Jira and provide a way to assign permissions to users within the context of a project. On the other hand, groups are global and can be used across multiple projects and even outside of the project context in the Jira instance.
Combining Groups and Roles for Optimal Management
Jira administrators often find that neither groups nor roles alone meet all their needs for managing permissions and access within Jira. In many cases, the most effective strategy involves a combination of both. Here’s how you can blend Jira groups and roles to achieve optimal management:
1. Start with a Base Layer of Groups
- Foundation for All Users: Create groups to provide all users with the fundamental permissions they need to work in Jira, such as logging in and creating issues.
- Standard Groups for Common Access: Establish standard groups for developers, testers, and project managers that define the basic level of access appropriate to their function.
2. Use Roles to Layer Additional Permissions
Project-Level Customization: Apply roles at the project level to refine the access provided by groups, allowing for project-specific customization without altering the broader access settings.
Adaptive Role Assignments: Assign roles to users or groups based on their project involvement, ensuring permissions are precisely tailored to their responsibilities within each project.
3. Utilize Groups for Simplified Administration
Central Management: Manage users at scale by adding or removing them from groups, which automatically updates their permissions across all relevant projects.
Controlled Access to Admin Functions: Create administrative groups to control who has access to sensitive functions and settings in Jira.
4. Deploy Roles for Flexible Permissions
Granular Control: Use roles to grant nuanced permissions within a project, such as the ability to manage sprints, without extending these permissions beyond the project’s scope.
Delegation of Permission Management: Empower project leads to manage role assignments within their projects, promoting efficiency and responsiveness to project needs.
5. Design a Hybrid Approach for Notifications
Global Notifications via Groups: Utilize groups to send out global notifications when the information is relevant to all users within the group.
Targeted Notifications via Roles: Leverage roles to send notifications about project-specific activities, ensuring that only the involved team members are alerted.
6. Align Groups and Roles with Permission Schemes
Consistent Permission Schemes: Design permission schemes that effectively use both groups and roles to ensure consistent permissions across multiple projects.
Ease of Permission Updates: Update permissions by modifying roles within projects or groups at the global level, allowing for quick adjustments as project requirements change.
Jira groups and roles serve different yet complementary purposes in managing user permissions. While groups are global and suitable for broad permission settings across multiple projects, roles offer more granular, project-specific control. Permission schemes are the mechanism by which administrators assign these permissions, utilizing both groups and roles to balance simplicity and flexibility. In practice, effective Jira administration often requires a hybrid approach, employing both groups and roles to align with the organization’s workflows and to ensure efficient and secure project management. Regular evaluation and adjustment of these permissions ensure they continue to meet the evolving needs of the team and the business.
Learn in detail how to create and manage a group with Atlassian Document