In our previous discussions, we delved into the basics of Jira workflows, laying the foundation for how tasks evolve from start to finish. As many have mastered the rudiments, it’s now time to elevate our understanding. Enter the realm of the “Advanced Jira Workflow“.
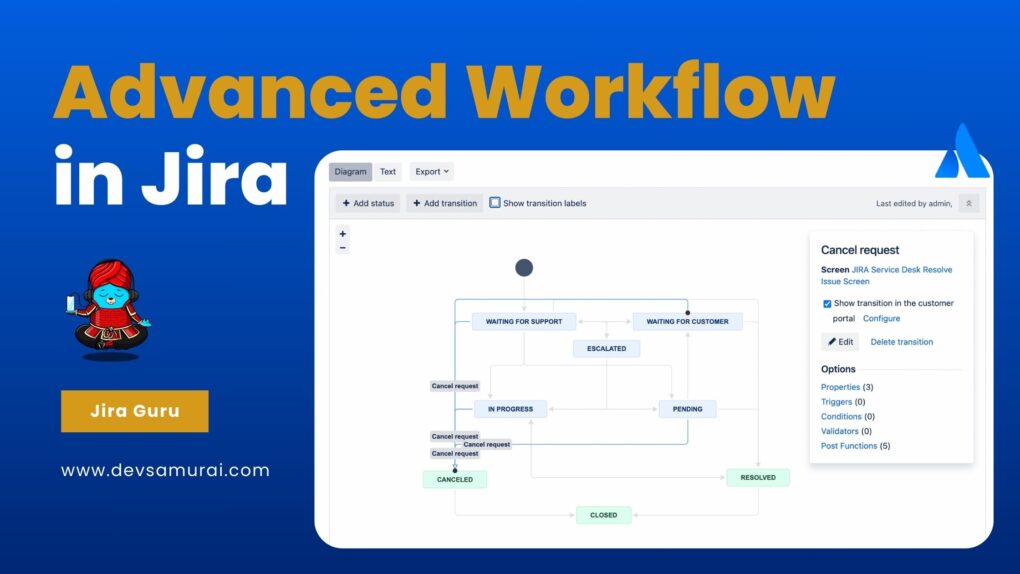
Building upon the core principles we’ve covered, the Advanced Jira Workflow introduces a plethora of enhanced functionalities. These are designed to offer greater flexibility and customization, catering to the unique challenges and nuances of different teams and projects.
This guide aims to unpack these advanced features, bridging the gap between basic understanding and expert utilization. Ready to step up your Jira game? Let’s dive deeper into the world of Advanced Jira Workflow!
Table of Contents
Understanding Jira’s Default Workflows
1. The Basic Workflow Components:
- Statuses: These are the stages or phases that an issue can be in during its lifecycle. Common statuses include “To Do,” “In Progress,” and “Done,” but Jira allows teams to create custom statuses that reflect their unique processes.
- Transitions: Transitions are the bridges between statuses. They define how an issue can move from one status to another. For example, an issue might transition from “To Do” to “In Progress” when someone starts working on it.
- Resolutions: This component specifies the outcome of an issue. Was it completed successfully? Was it canceled? Resolutions help teams clarify the end state of an issue, with common resolutions like “Fixed,” “Won’t Fix,” or “Duplicate.”
2. The Limitations of Default Workflows:
While Jira’s default workflows provide a solid starting point for many teams, there are reasons why they might not be the perfect fit for all:
- One Size Doesn’t Fit All: Every team has its unique requirements, processes, and terminologies. The default workflow is generic and might not capture the specificity of certain teams or projects.
- Complexity of Projects: For more intricate projects that involve multiple departments or phases, the basic “To Do – In Progress – Done” might be overly simplistic. There might be a need to capture additional stages like “QA Testing,” “Client Review,” or “Deployment.”
- Regulatory & Compliance Needs: Some industries or projects are bound by stringent regulatory and compliance standards. The default workflows might not accommodate the checks, validations, and approvals required.
- Integration with Other Systems: Companies that use a suite of tools and wish to integrate Jira with other systems might find the default workflows lacking the necessary hooks or triggers for seamless integration.
Advanced Workflow Components
As teams grow and projects become more intricate, Jira users often find themselves needing to explore advanced workflow components to streamline processes, improve visibility, and automate repetitive tasks. Let’s dive into some of these advanced components that elevate the Jira experience from a mere task-tracking tool to a robust project management solution.
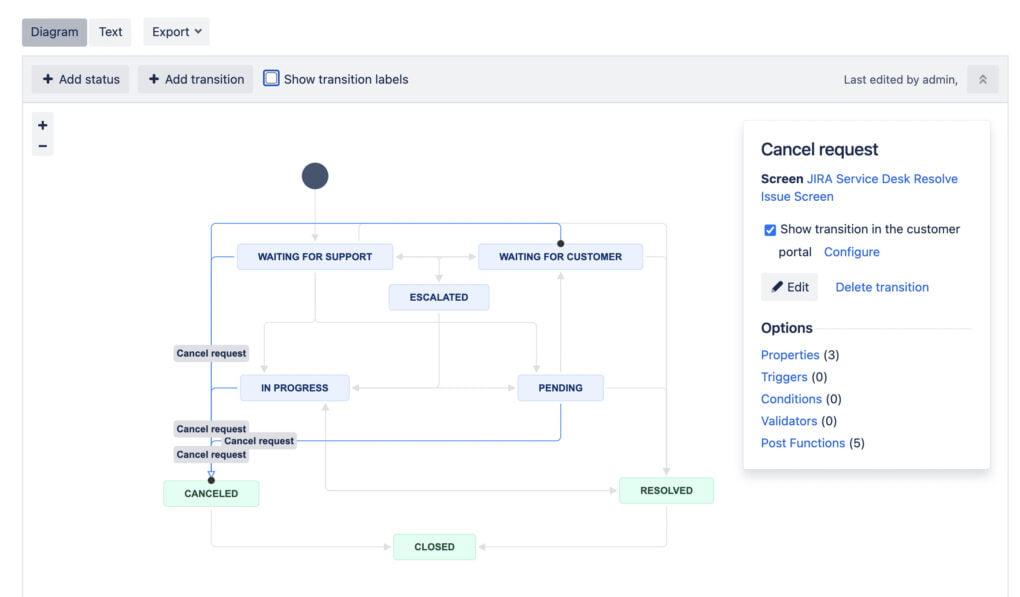
1. Conditions:
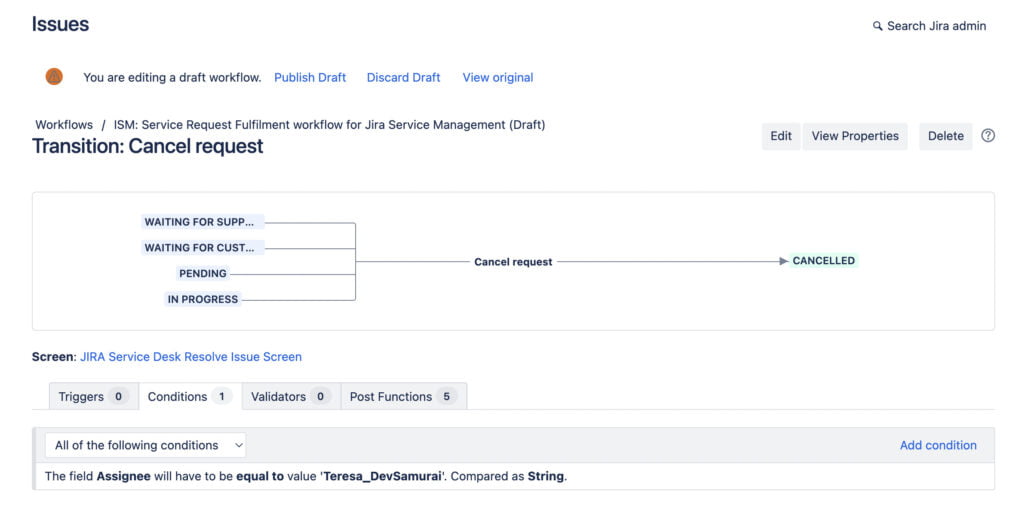
- What are they? Conditions determine whether a particular transition is available to a user. They’re like gates – if you meet the condition, the gate opens; otherwise, it remains closed.
- Why use them? To ensure that certain transitions can only be executed by specific roles or under specific circumstances. For example, only a project manager might be allowed to move an issue to the “Approved” status.
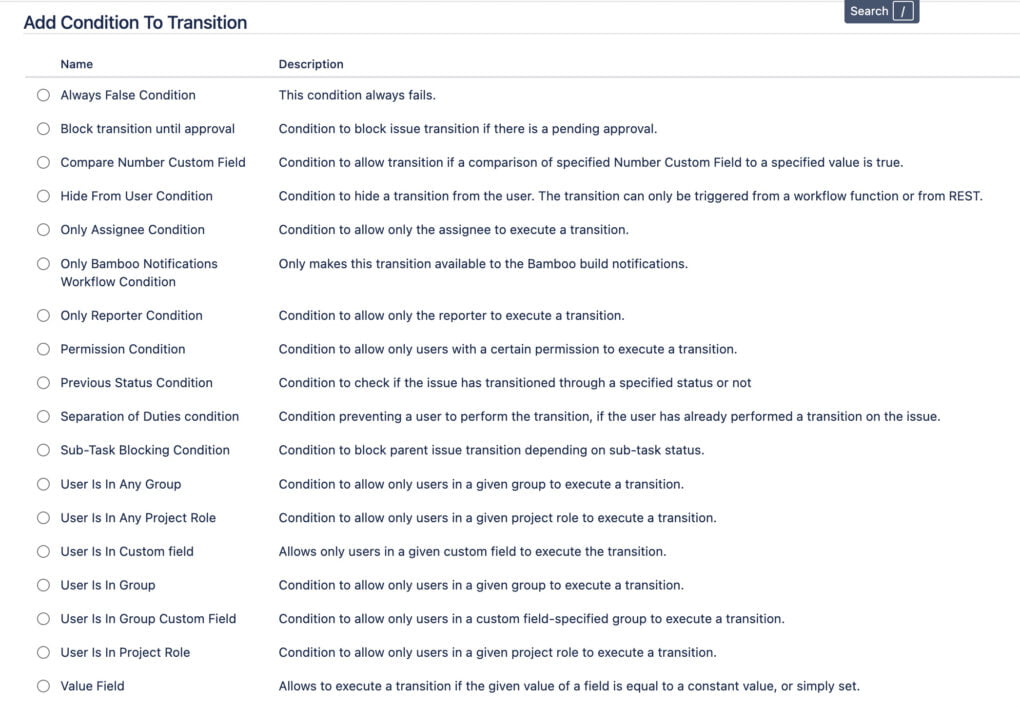
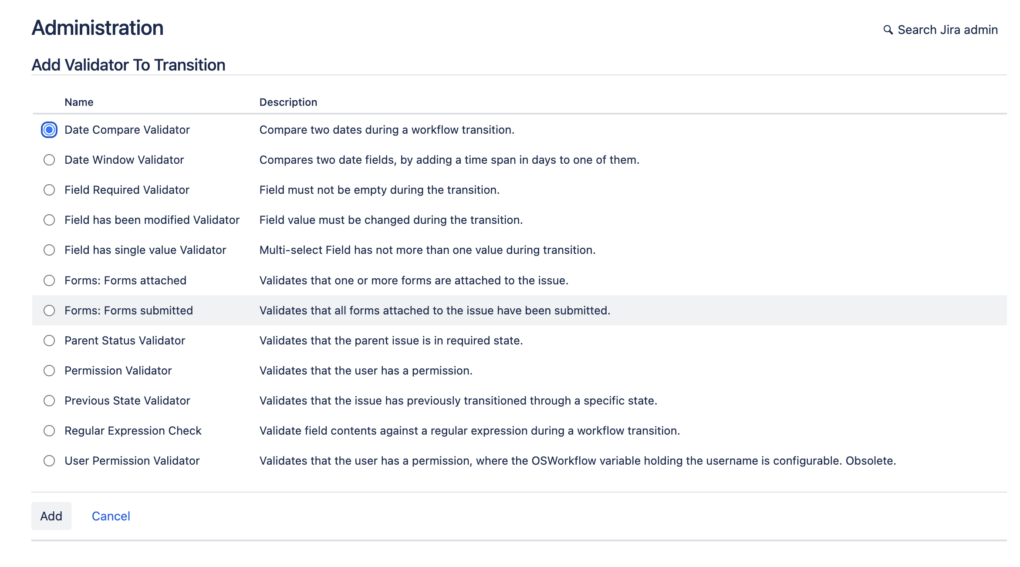
2. Validators:
- What are they? Validators check that any input or action taken during a transition meets specified criteria before the transition is allowed to proceed.
- Why use them? To ensure data integrity and adherence to processes. For instance, a validator could ensure that all required fields are filled out before an issue moves from “In Progress” to “Completed”.
3. Post-functions:
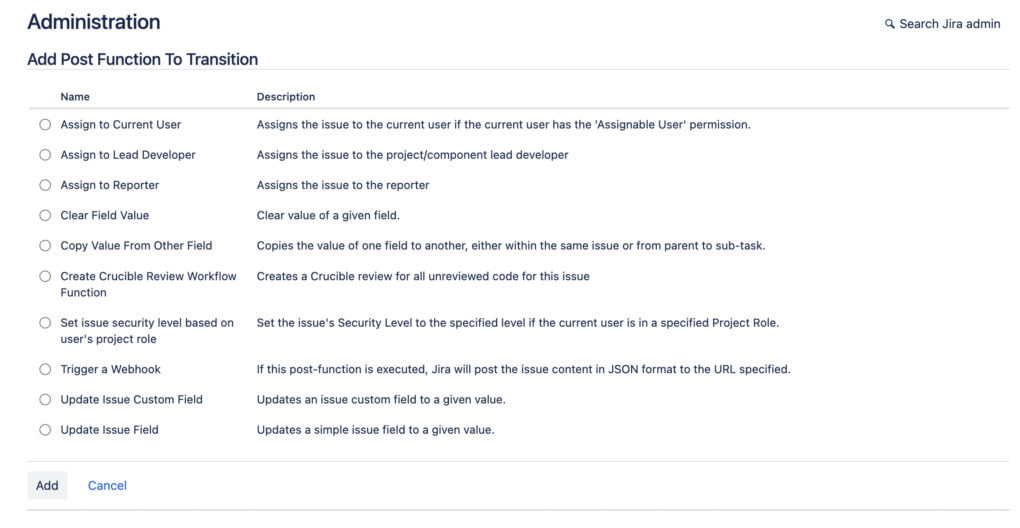
- What are they? Post-functions carry out additional automated tasks after a transition has taken place.
- Why use them? To automate repetitive tasks or maintain consistency. For example, once an issue is transitioned to “Done”, a post-function could automatically update its resolution date.
4. Triggers:
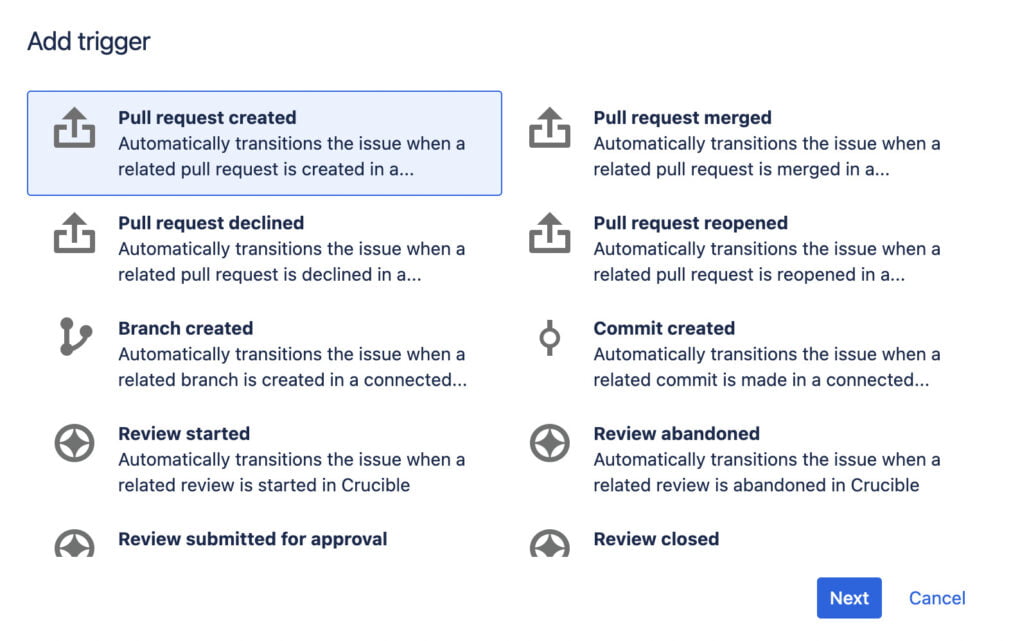
- What are they? Triggers initiate a transition in Jira when a specific event occurs in a connected tool or system.
- Why use them? To synchronize Jira with other tools and ensure real-time updates. If your code repository tool signifies that a fix is committed, a trigger can automatically move the related Jira issue to the “Code Review” status.
5. Properties:
- What are they? Properties are key-value pairs that can be added to statuses or transitions to influence their behavior.
- Why use them? To customize the appearance or availability of workflow elements based on specific criteria. For instance, you might use a property to hide a transition button from everyone except administrators.

6. Loops and Global Transitions:
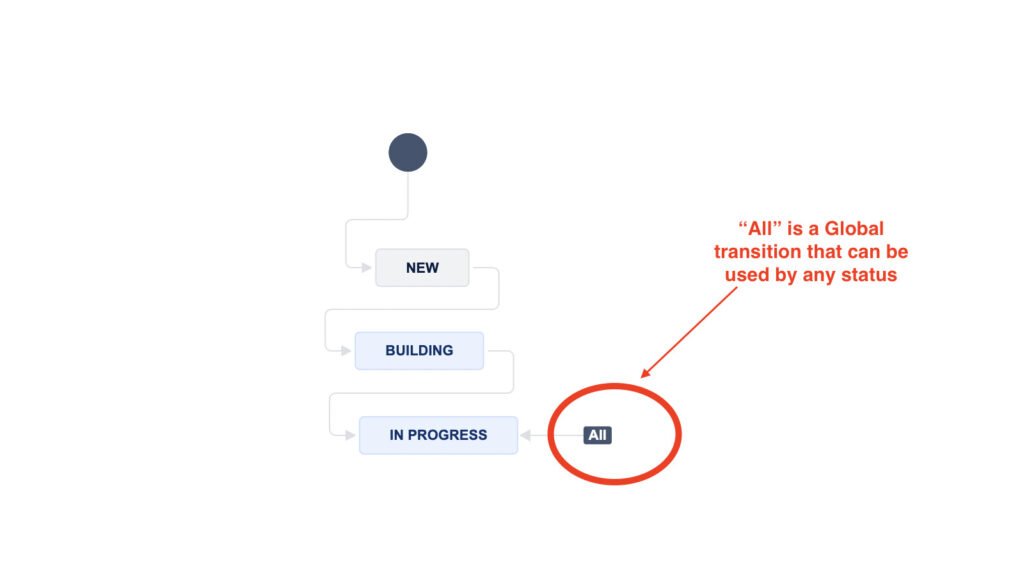
- What are they? Loops allow issues to cycle between certain statuses multiple times, while global transitions make a particular transition available from any status.
- Why use them? For flexibility in process management. If your testing process requires issues to move back and forth between “Testing” and “Revising”, loops would be handy. On the other hand, if you want any issue, regardless of its current status, to be quickly moved to “Urgent”, a global transition would be apt.
Check how to do it with Atlassian document here
Designing an Advanced Workflow: Key Steps
Building an advanced Jira workflow requires a strategic approach that caters to the unique needs of your project while also optimizing the user experience. Here’s a step-by-step guide to help you design an advanced workflow that’s efficient and effective:
1. Identify Specific Needs:
Start by understanding the distinct requirements of your project.
- Conduct meetings with stakeholders to gather insights.
- Document the various stages an issue might pass through and the conditions governing those transitions.
2. Map Out the Workflow:
Visually represent the process.
- Use flowcharts or diagrams to outline the path from issue creation to resolution.
- Clearly define statuses, transitions, and any loops or global transitions required.
3. Incorporate Advanced Components:
Based on the needs identified:
- Add conditions to ensure that only authorized individuals can make certain transitions.
- Use validators to check for necessary criteria before transitions.
- Implement post-functions to automate certain tasks post-transition.
- Set up triggers if you need synchronization with other tools.
- Add properties to customize behavior or visibility of certain workflow elements.
4. Test the Workflow:
Before fully implementing, test the workflow:
- Initiate a pilot phase with a small team.
- Encourage feedback and identify any pain points or bottlenecks.
- Make necessary adjustments based on the feedback received.
5. Train the Team:
Ensure everyone understands the new advanced workflow:
- Conduct training sessions or workshops.
- Provide documentation outlining the various components and their purpose.
- Answer any questions and clarify doubts to ensure smooth adaptation.
6. Monitor and Iterate:
An advanced workflow isn’t a set-it-and-forget-it tool.
- Regularly review the workflow’s efficiency.
- Gather feedback periodically from users.
- Make adjustments as your project evolves or as new challenges arise.
7. Backup and Version Control:
As you make changes, it’s essential to:
- Keep backups of previous workflow versions.
- Document changes with version numbers and changelogs.
- This ensures you can revert to a previous version if needed and track the evolution of your workflow.
Use Cases: Advanced Workflows in Action
Advanced Jira workflows are crucial in ensuring that intricate processes run smoothly. They aid in seamlessly integrating various stages, feedback loops, and transitions, streamlining the project management experience. Here’s how these workflows can be adapted to diverse sectors:
1. Software Development:
Incorporating Code Reviews, Build & Deployment Stages
Challenge: Software development is a multifaceted procedure involving various teams, multiple review cycles, and deployment phases.
Solution: Using advanced Jira workflows, one can:
- Integrate stages like ‘Development’, ‘Code Review’, ‘Build’, and ‘Deployment’.
- Use conditional transitions, such as allowing a move to the ‘Deployment’ phase only after successful code reviews and builds.
- Set automated notifications to alert developers of code review feedback or deployment success/failure.
2. Marketing Campaigns:
Incorporating Stages like Content Approval, A/B Testing, and Post-Campaign Analysis
Challenge: Marketing campaigns involve ideation, content creation, testing, and a final analysis to measure the campaign’s success.
Solution: Advanced workflows can be tailored to:
- Define stages like ‘Content Draft’, ‘Approval’, ‘A/B Testing’, and ‘Analysis’.
- Use validators to ensure content meets set standards before it’s approved for testing.
- Incorporate post-functions to collate and present data post-campaign for insightful analysis.
3. Product Management:
Handling Feature Requests, User Feedback, and Product Releases
Challenge: Managing a product involves juggling new feature requests, addressing user feedback, and planning product releases.
Solution: With a sophisticated Jira workflow, teams can:
- Segregate tasks into statuses like ‘Feature Suggestion’, ‘Feedback Review’, ‘Development’, and ‘Release’.
- Ensure that features undergo rigorous testing before approving them for the next release.
- Use triggers to notify product teams when significant user feedback arrives, ensuring swift and adequate responses.
Advanced Jira workflows are essential in today’s complex project landscapes. They enable teams to operate with enhanced efficiency, precision, and clarity. As we’ve explored, from software development to marketing campaigns, the flexibility and depth offered by these advanced tools can be game-changing. As you evolve in your project management pursuits, consider leveraging advanced Jira workflows to truly elevate your projects’ success and efficiency.


