Register & Get Started with Jira Software | Jira Guru | 5 Minutes Learning with DevSamurai
Welcome to Jira Guru! In this blog, we will guide you through the process of registering and getting started with Jira Software. Jira is a powerful tool for project management and issue tracking. It is widely used by teams in various industries, from software development to marketing and operations. However, for new users, the tool can be overwhelming at first. In this blog post, we will provide a step-by-step guide on how to get started with Jira and make the most of its features.

What is Jira?
Jira is a software development tool used for project management and issue tracking. It was developed by Atlassian and is commonly used by software development teams to plan, track, and release software projects.
Jira allows teams to organize and prioritize their work by creating and assigning tasks, called “issues” to team members. These issues can be tracked and managed through various stages of development, such as “To Do,” “In Progress,” and “Done.”
Jira also includes a number of built-in features, such as the ability to track bugs and feature requests, assign and manage deadlines, and generate reports on project progress. Additionally, Jira can integrate with other tools, such as Slack, Trello, and Git, to provide a seamless workflow for software development teams.
Benefits of Jira
One of the key benefits of Jira is its flexibility. It can be used for a wide range of software development processes, including Agile, Scrum, and Waterfall. This makes it a popular choice among teams using different methodologies.
Jira is available in both cloud-based and on-premise versions, so teams can choose the option that best fits their needs. It also offers a range of pricing options, including a free version for small teams and paid versions with additional features for larger teams.
Overall, Jira is a powerful and versatile tool that can help software development teams stay organized, track progress, and manage issues effectively.
How to get started with Jira?
Sign up for a Jira account
To sign up for a Jira account, follow these steps:
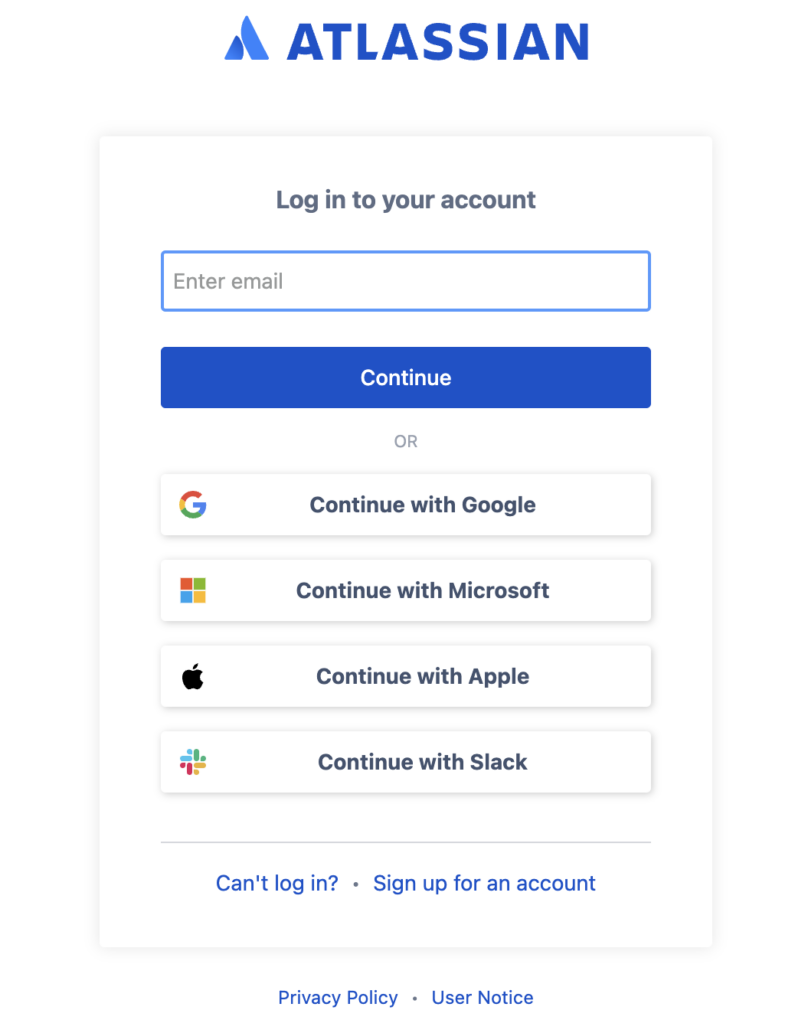
Step 1: Go to the Atlassian website: To begin, go to the Atlassian website (https://www.atlassian.com/).
Step 2: Click on the “My account” button: On the homepage, click on the “My Account” and “Login” button
Step 3: Fill in the required information: Fill in the required information to create your account, such as your email address and password.
Step 4: Click on the “Create my account” button: Click on the “Create my account” button to submit your information.
Step 5: Verify your email address: Verify your email address by following the instructions sent to your email inbox.
Step 6: Log in to your new Jira account: Once you’ve verified your email, you can log in to your new Jira account and start creating projects.
Note: If you are creating an account for a company, you may need to provide additional information such as company name, address, and number of users.
Create a new project
Get started with managing your tasks and issues.
Step 1: Log in to your Jira account
To begin, log in to your Jira account using your email and password.
Step 2: Click on the “Create a Project” button
Once you’re logged in, you’ll be prompted to create a new project. Click on the “Create a Project” button, which is located in the top right corner of the screen.
Step 3: Choose a template
You will be presented with a number of templates to choose from, such as software development, IT service desk, and marketing. Choose the template that best fits your project.
Step 4: Customize your project settings
Once you’ve chosen a template, you can customize your project’s settings and configuration. This includes adding users, setting up issue types, and configuring workflows.
Step 5: Set up your project’s components
You can also set up your project’s components, such as versions, components and custom fields. This will help you to better organize and categorize your issues.
Step 6: Name your project
Give your project a name, it will be the identifier for your project, for example “Marketing Campaign 2023”.
Step 7: Create your project
Once you’ve finished customizing your project settings, click on the “Create” button to create your project.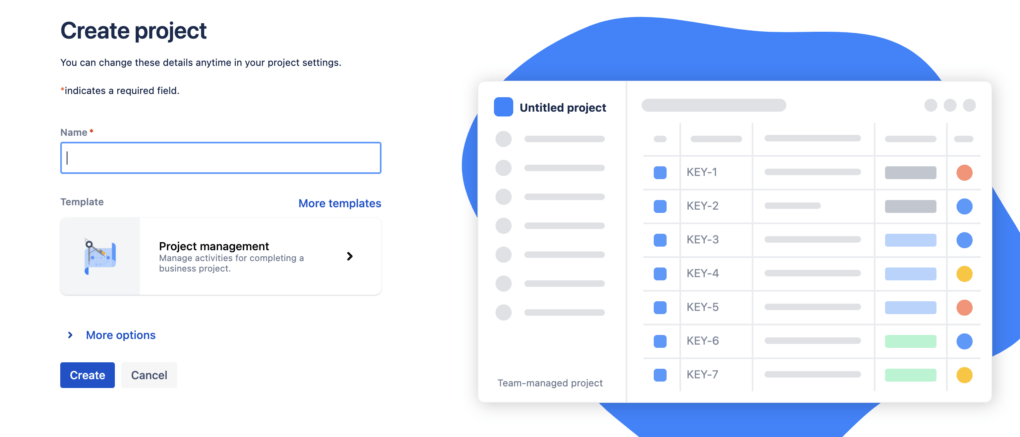
Create your first issue
Create your first issue in Jira.
Step 1: Select the project
Select the project for which you want to create an issue.
Step 2: Click on the “Create” button
Once you are in the project, look for the “Create” button, it’s usually located in the top-right corner of the screen.
Step 3: Fill in the details of the issue
You will be prompted to fill in the details of the issue, such as the summary, description, and priority. Make sure to provide as much information as possible so that the person assigned to the issue will have a clear understanding of what needs to be done.

Assign and set a due date
How to assign and set a due date for an issue in Jira.
Step 1: Select the project
Select the project for which you want to assign and set a due date for an issue.
Step 2: Click on the “Issues” button
Once you are in the project, click on the “Issues” button to access the list of issues for the project.
Step 3: Select the issue
Select the issue that you want to assign and set a due date for.
Step 4: Click on the “Assign” button
You can assign the issue to a team member by clicking on the “Assign” button, this button is located on the right-hand side of the issue detail view.
Step 5: Assign the issue
Select the person from the list of users who will be responsible for the task. You can also leave the issue unassigned if you don’t know yet who will be working on it.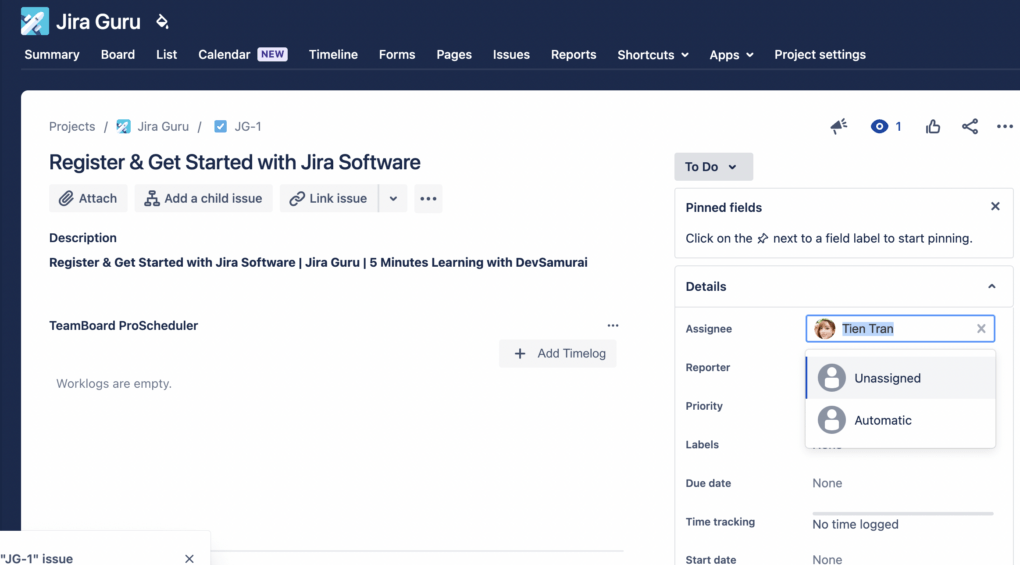
Step 6: Click on the “Due Date” button
You can set the due date for the issue by clicking on the “Due Date” button, which is located on the right-hand side of the issue detail view.
Step 7: Set the due date
Select the date from the calendar, this will help everyone to know when the task is supposed to be completed.
Step 8: Save the changes
Once you’ve finished assigning the issue and setting the due date, click on the “Update” button to save the changes.
Step 9: Track the progress of the issue
You can track the progress of the issue by looking at the status, the assignee, the due date and comments.
Use Jira’s features
How to use some of Jira’s most popular features.
Step 1: Kanban board
The Kanban board is a visual tool that allows users to see the workflow of their project and prioritize tasks. To access the Kanban board, navigate to the “Boards” menu and select the project you want to view. You can then drag and drop issues between columns to represent the status of each task.
Step 2: Backlog
The backlog is another visual tool that allows users to prioritize tasks and plan upcoming work. To access the backlog, navigate to the “Backlog” menu and select the project you want to view. You can then drag and drop issues to re-prioritize them and plan upcoming work.
Step 3: Filters
Filters allow users to sort and search for issues based on specific criteria. To create a filter, navigate to the “Issues” menu and select the “Search for issues” option. You can then specify the criteria you want to filter by, such as assignee, status, or label.
Step 4: Reports
Reports provide users with insights into the performance of their project. To access reports, navigate to the “Projects” menu and select the project you want to view. You can then select from a variety of reports, such as burndown charts, sprint reports, and version reports.
Step 5: Apps
Jira offers a wide range of Apps with other tools, such as Trello, GitHub, and Slack, TeamBoard Pro Scheduler, Mocky, AssetIT, to help users streamline their workflow. To access Apps, navigate to the “Apps” option. You can then connect Jira to other tools and automate certain tasks.
Conclusion, Jira is a powerful tool that can help teams of all sizes and industries to stay organized and on track. By following the steps outlined in this guide, you’ll be able to get started with Jira and make the most of its features. Remember that it’s important to explore the documentation, tutorials, and videos provided by Jira to get a better understanding of how to use the tool effectively.
About DevSamurai
DevSamurai is a Global IT service company that provides DevOps solutions for Jira, Atlassian and more… using cutting-edge technology to its growing customer base. DevSamurai is customer-centric and helps clients to leverage the power of IT to improve their business. DevSamurai use cloud computing platforms, DevOps tools, and best practices in global industry standards to guarantee the efficiency of their clients’ organization.
If you want even more app to manage your project, check out these resources:
TeamBoard Pro Scheduler | Gantt chart, Timesheets, Resource Planning, Project Management for Jira
Mocky | Wireframes Mockups Diagrams